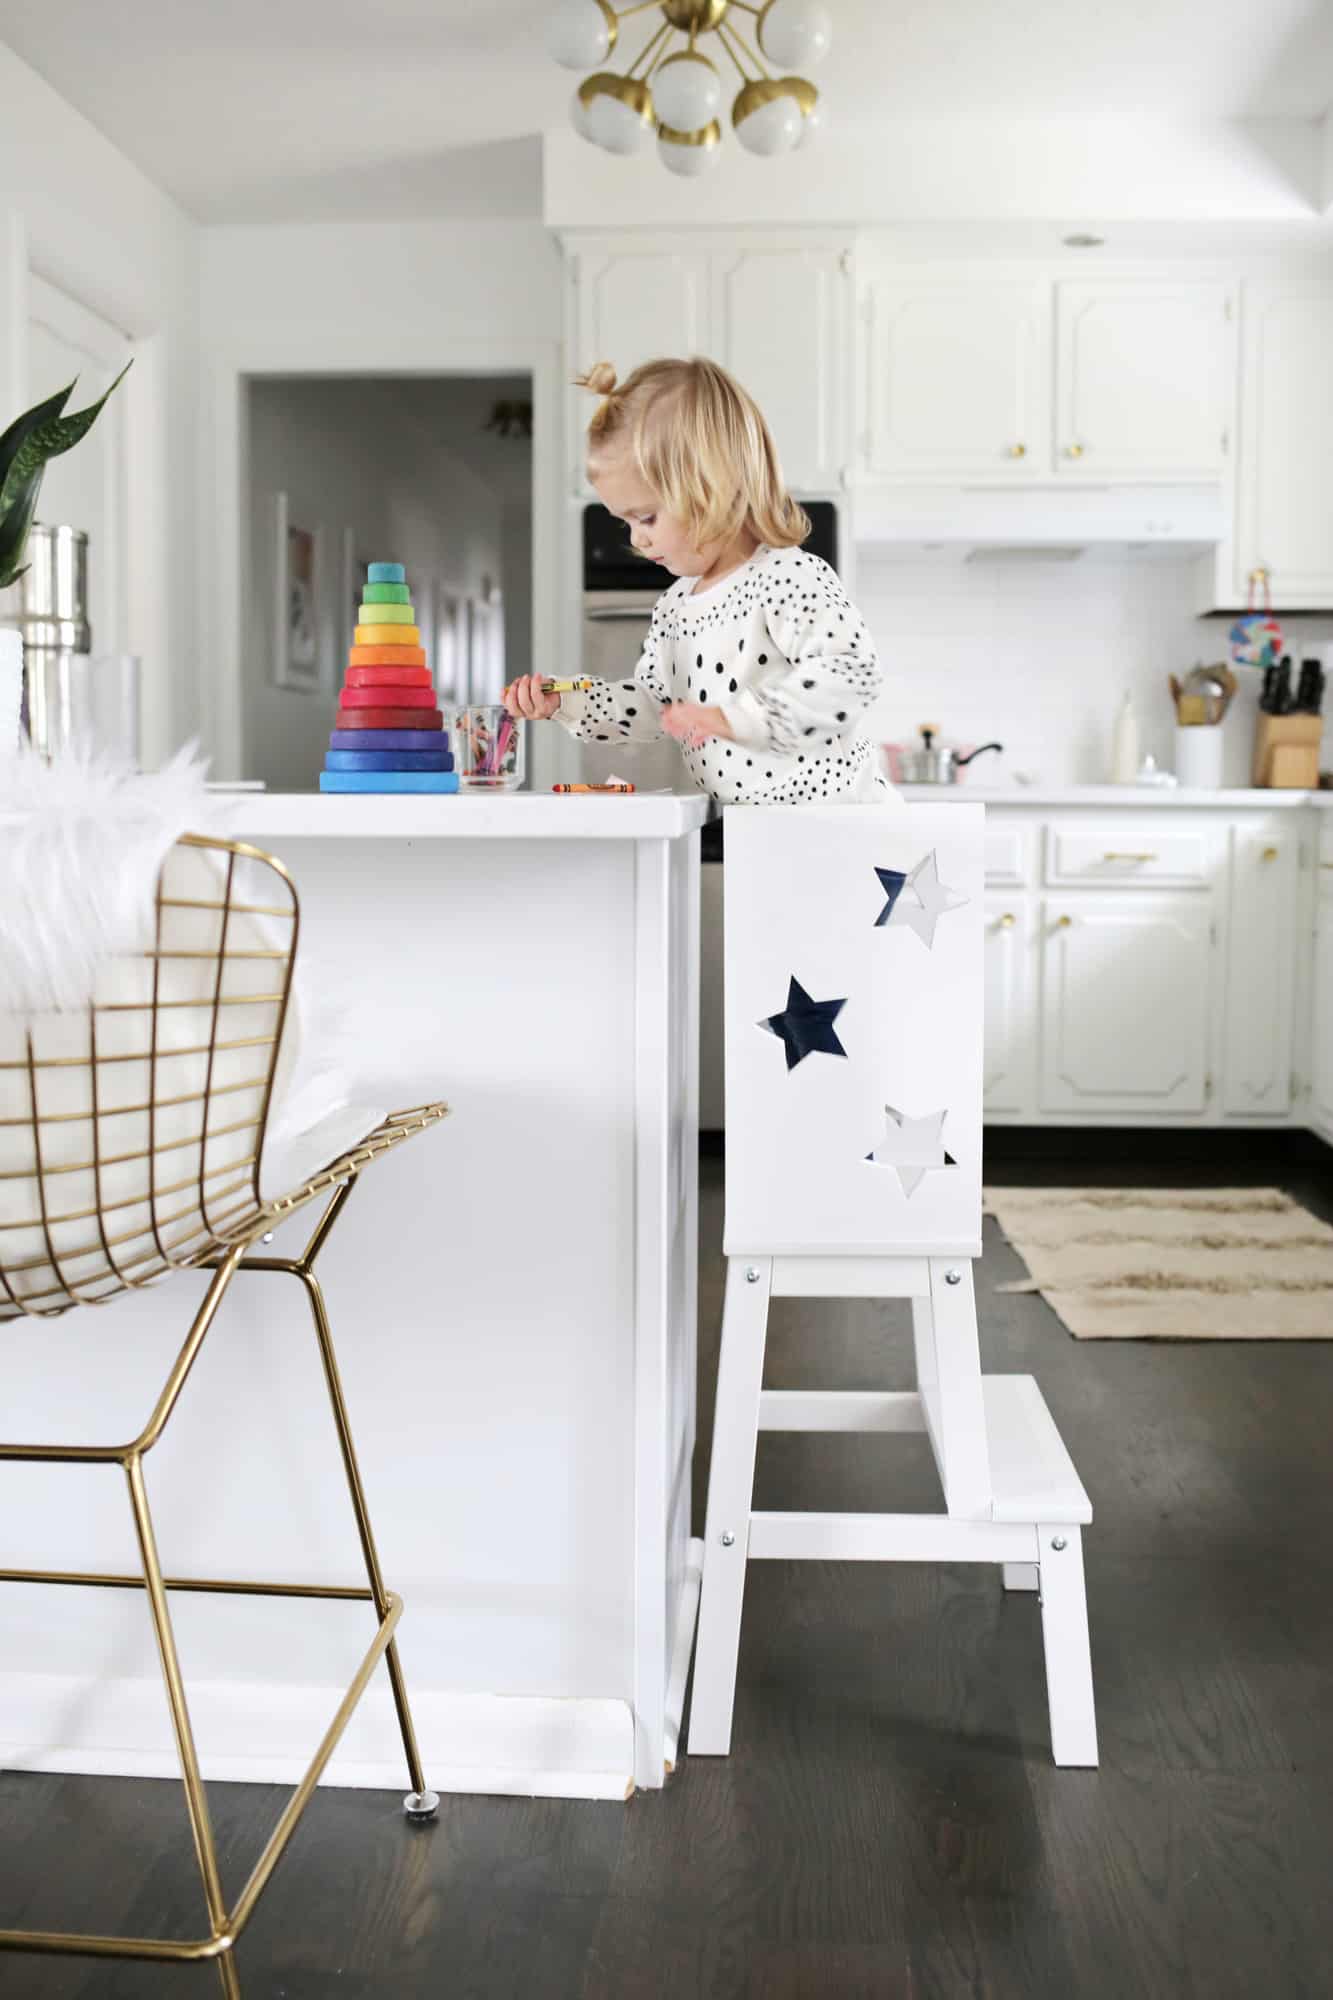
OK, OK, so I remember the first time I saw one of these “learning towers” a few months ago and my parent brain just about exploded with the thought of “that’s exactly what we need!!” At 21 months, Lola is like most toddlers in that she mentally and emotionally starts to deteriorate around 4 p.m., so making dinner can be super difficult since she either wants you to hold her the whole time or hangs out right between my legs pulling on me as I try to cook—not the easiest way to made dinner, for sure! These types of towers allow toddlers to be at counter height so they can both see what you’re doing (which she’s always interested in) and participate in the cooking or play with their own toys while you cook.
It seems to be a lifesaver for other moms with clingy toddlers around dinnertime and is also a great way to get them started on “helping” you in the kitchen, so I was super excited to give it a try! Now, there are lots of these toddler towers online that you can buy or make and a lot of the DIY ones have you use a stool (like this IKEA one I used) as the base of the tower, so you only have to build the top. Getting the tower done in half the time sounded good to me, so I opted to go that route as well but make a few tweaks to the design so it looked a little more fun and custom …
Related: For more kids activities and printables check out Childhood Magic!
Now, before we even start, here’s a side note about safety—some parents might feel comfortable using a learning tower but only if it was made by a company that sells them. Others might feel safe making their own once they’ve tested it and feel good about its stability, and others wouldn’t feel safe at all with any learning tower setup. And all of those are totally fine options. This tower is only meant to be used while under supervision and I would suggest it be used when your child is at an age where their abilities will allow them to climb in and out of the tower on their own successfully (based on what I’ve seen, that could be anywhere from 12-18 months, depending on how early they walk and their coordination and strength).
OK! Let’s get started!
Supplies:
–1/2″ dowel rod cut to 12.5″ length for rod across the back*
-1.5″ x 3/4″ boards cut 12.5″ long (you’ll need 2 of these for the front slats)
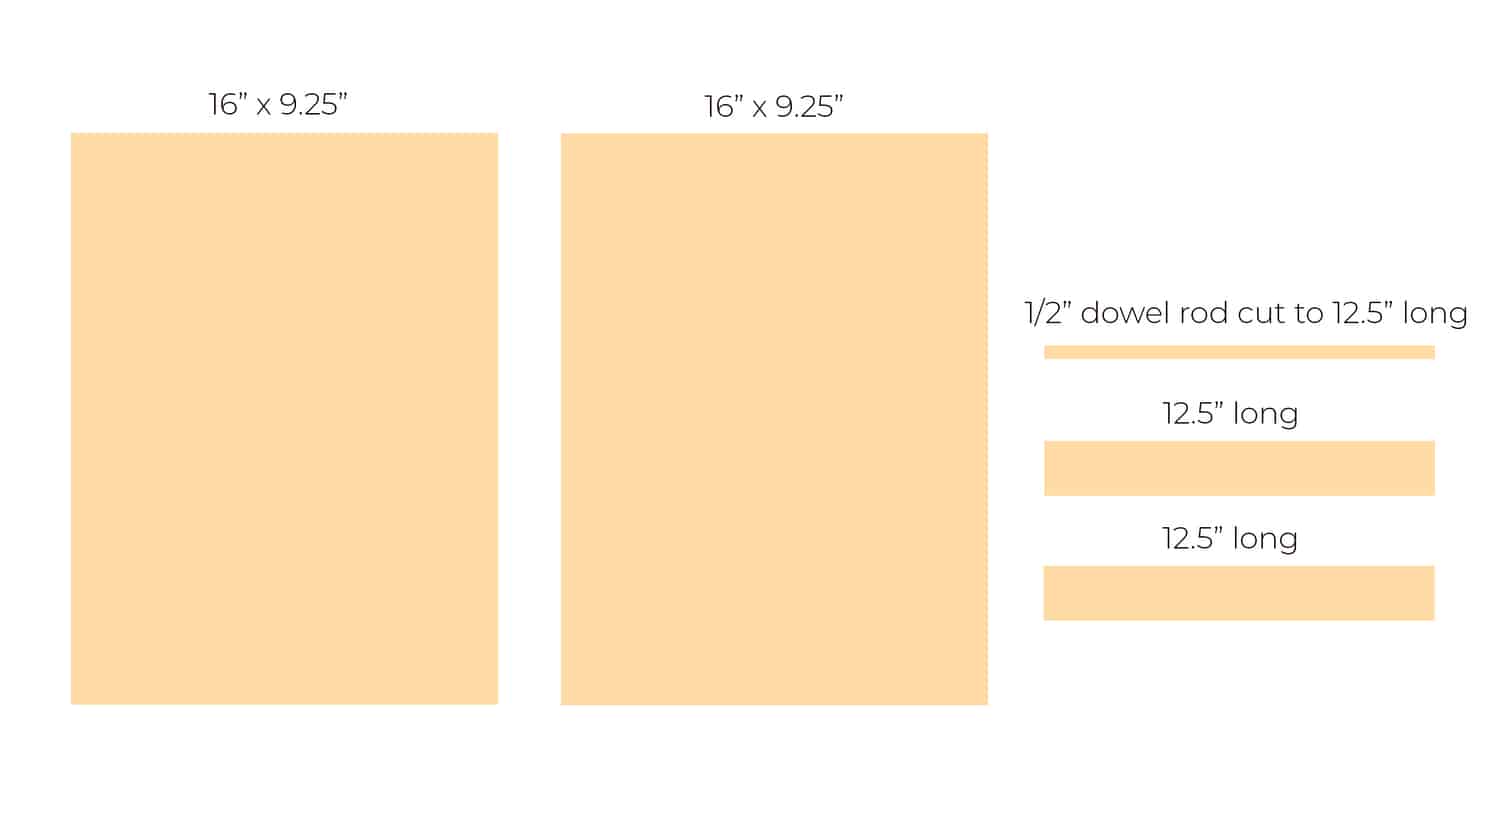
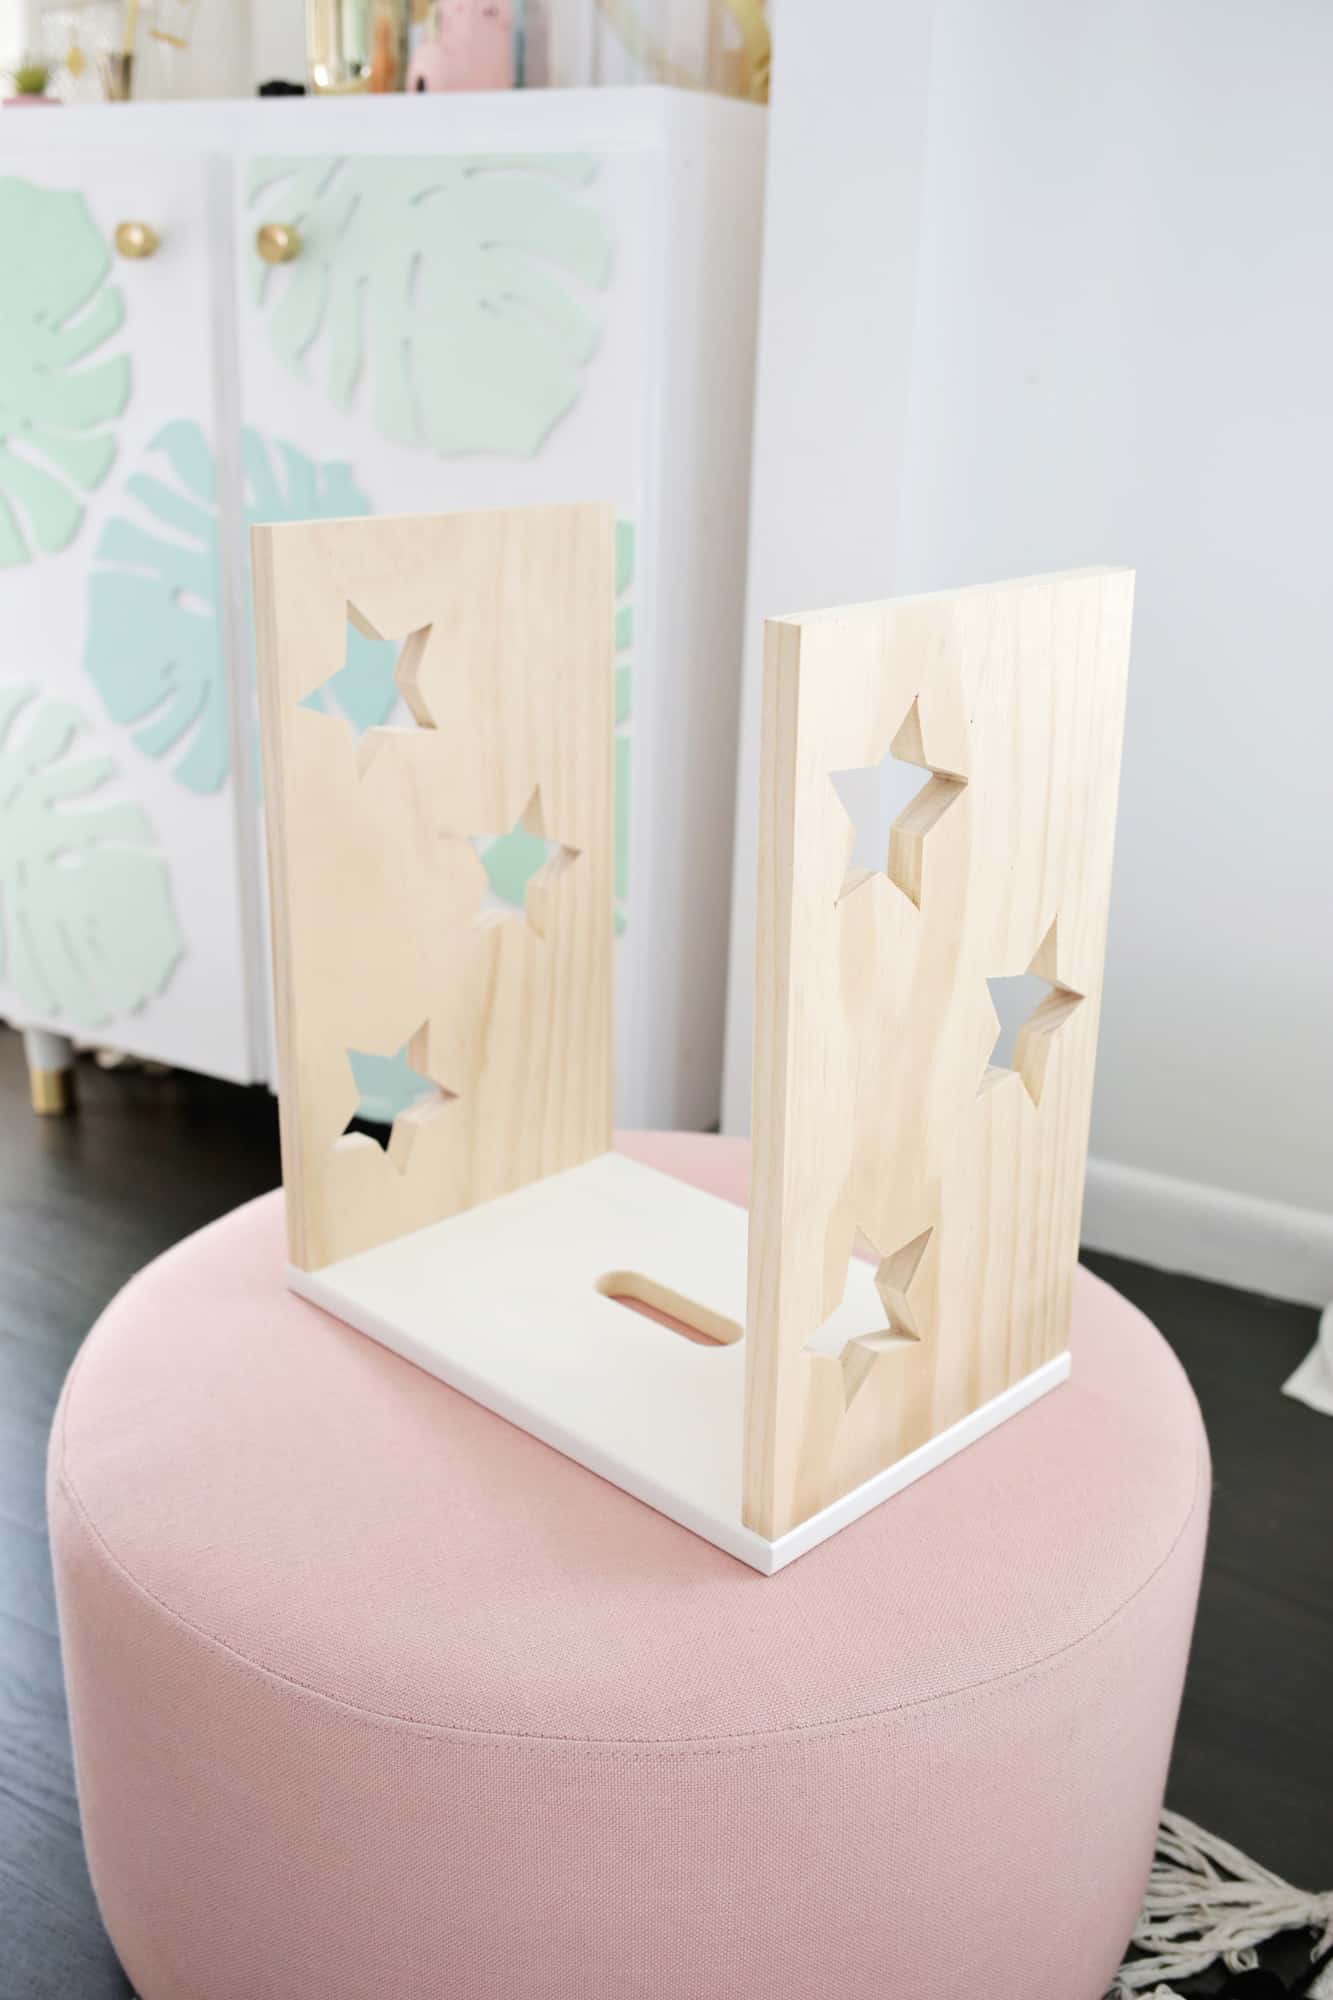
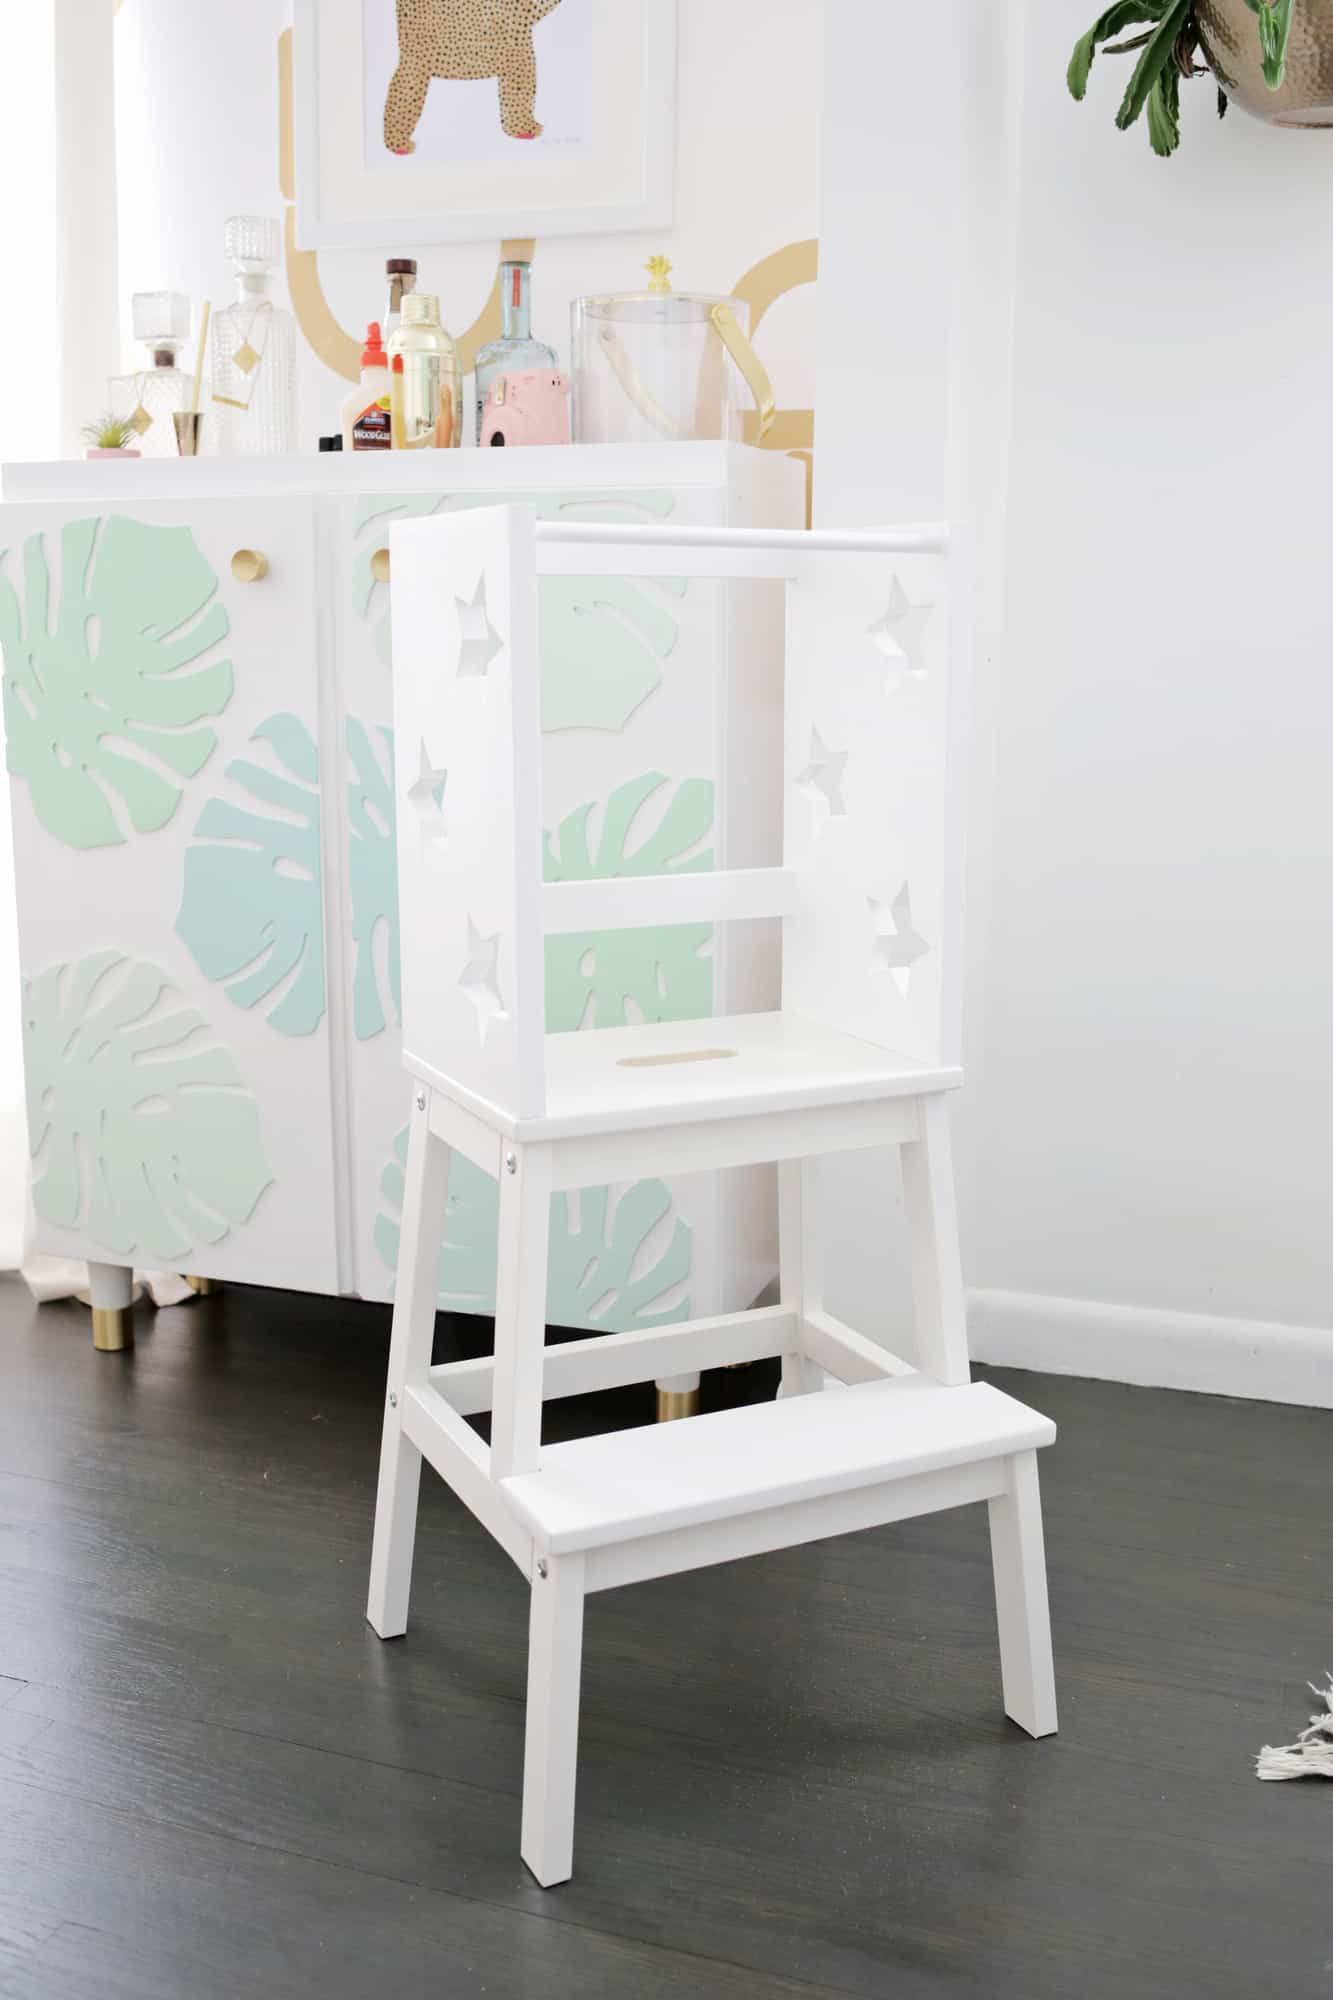
-3/4″ thick boards cut to 16″ x 9.25″ (you’ll need 2 of these for the sides and I did 16″ tall since that would bring the tower up to my counter height, so you can adjust that number as needed for your counter)
–IKEA Beckvam stool in color of choice
–#6 wood screws (1 1/4″ long)
–#4 wood screws (1 1/4″ long)
–drill and drill bits
–countersink drill bit and wood filler (optional)
-paint color of choice if painting
–jig saw and smooth jig saw blades
–light grit sandpaper
–large clamps (2 are optional but helpful)
–wood glue
-star pattern (right click to download)
*So, you can either get your wood and cut it at home with a jig saw or other power saw option or you can ask the lumber place/home improvement store to cut it for you for a small fee. Depending on who cuts the wood for you, the measurements may be more or less precise, so double check them before you leave to see if you need pieces recut or adjusted.

 Cut your 5 wood pieces to the measurements listed in the supply list, adjusting the 16″ height as needed for your countertops.
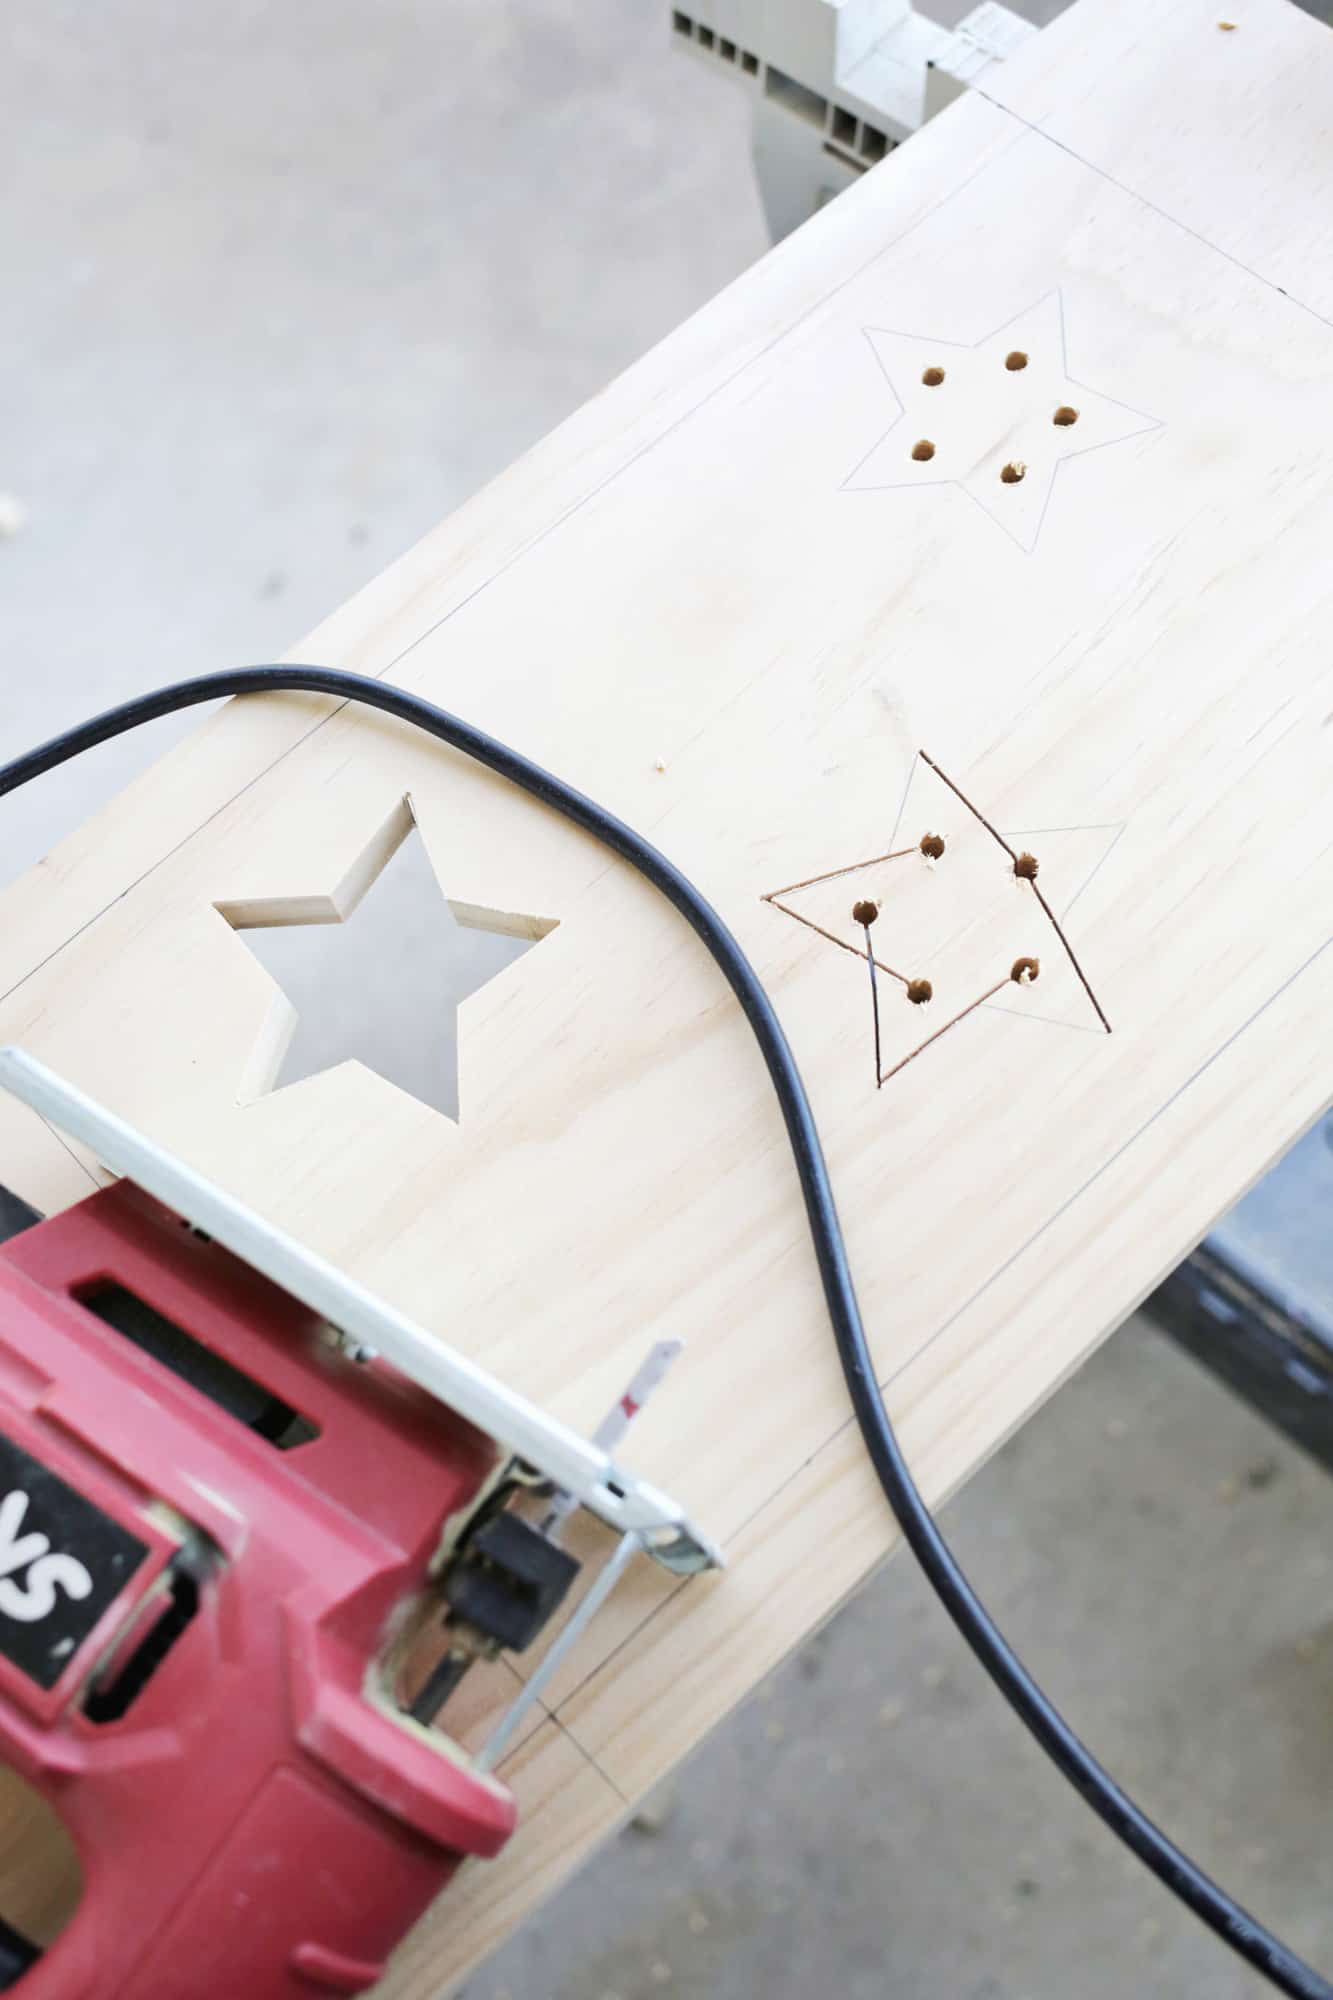
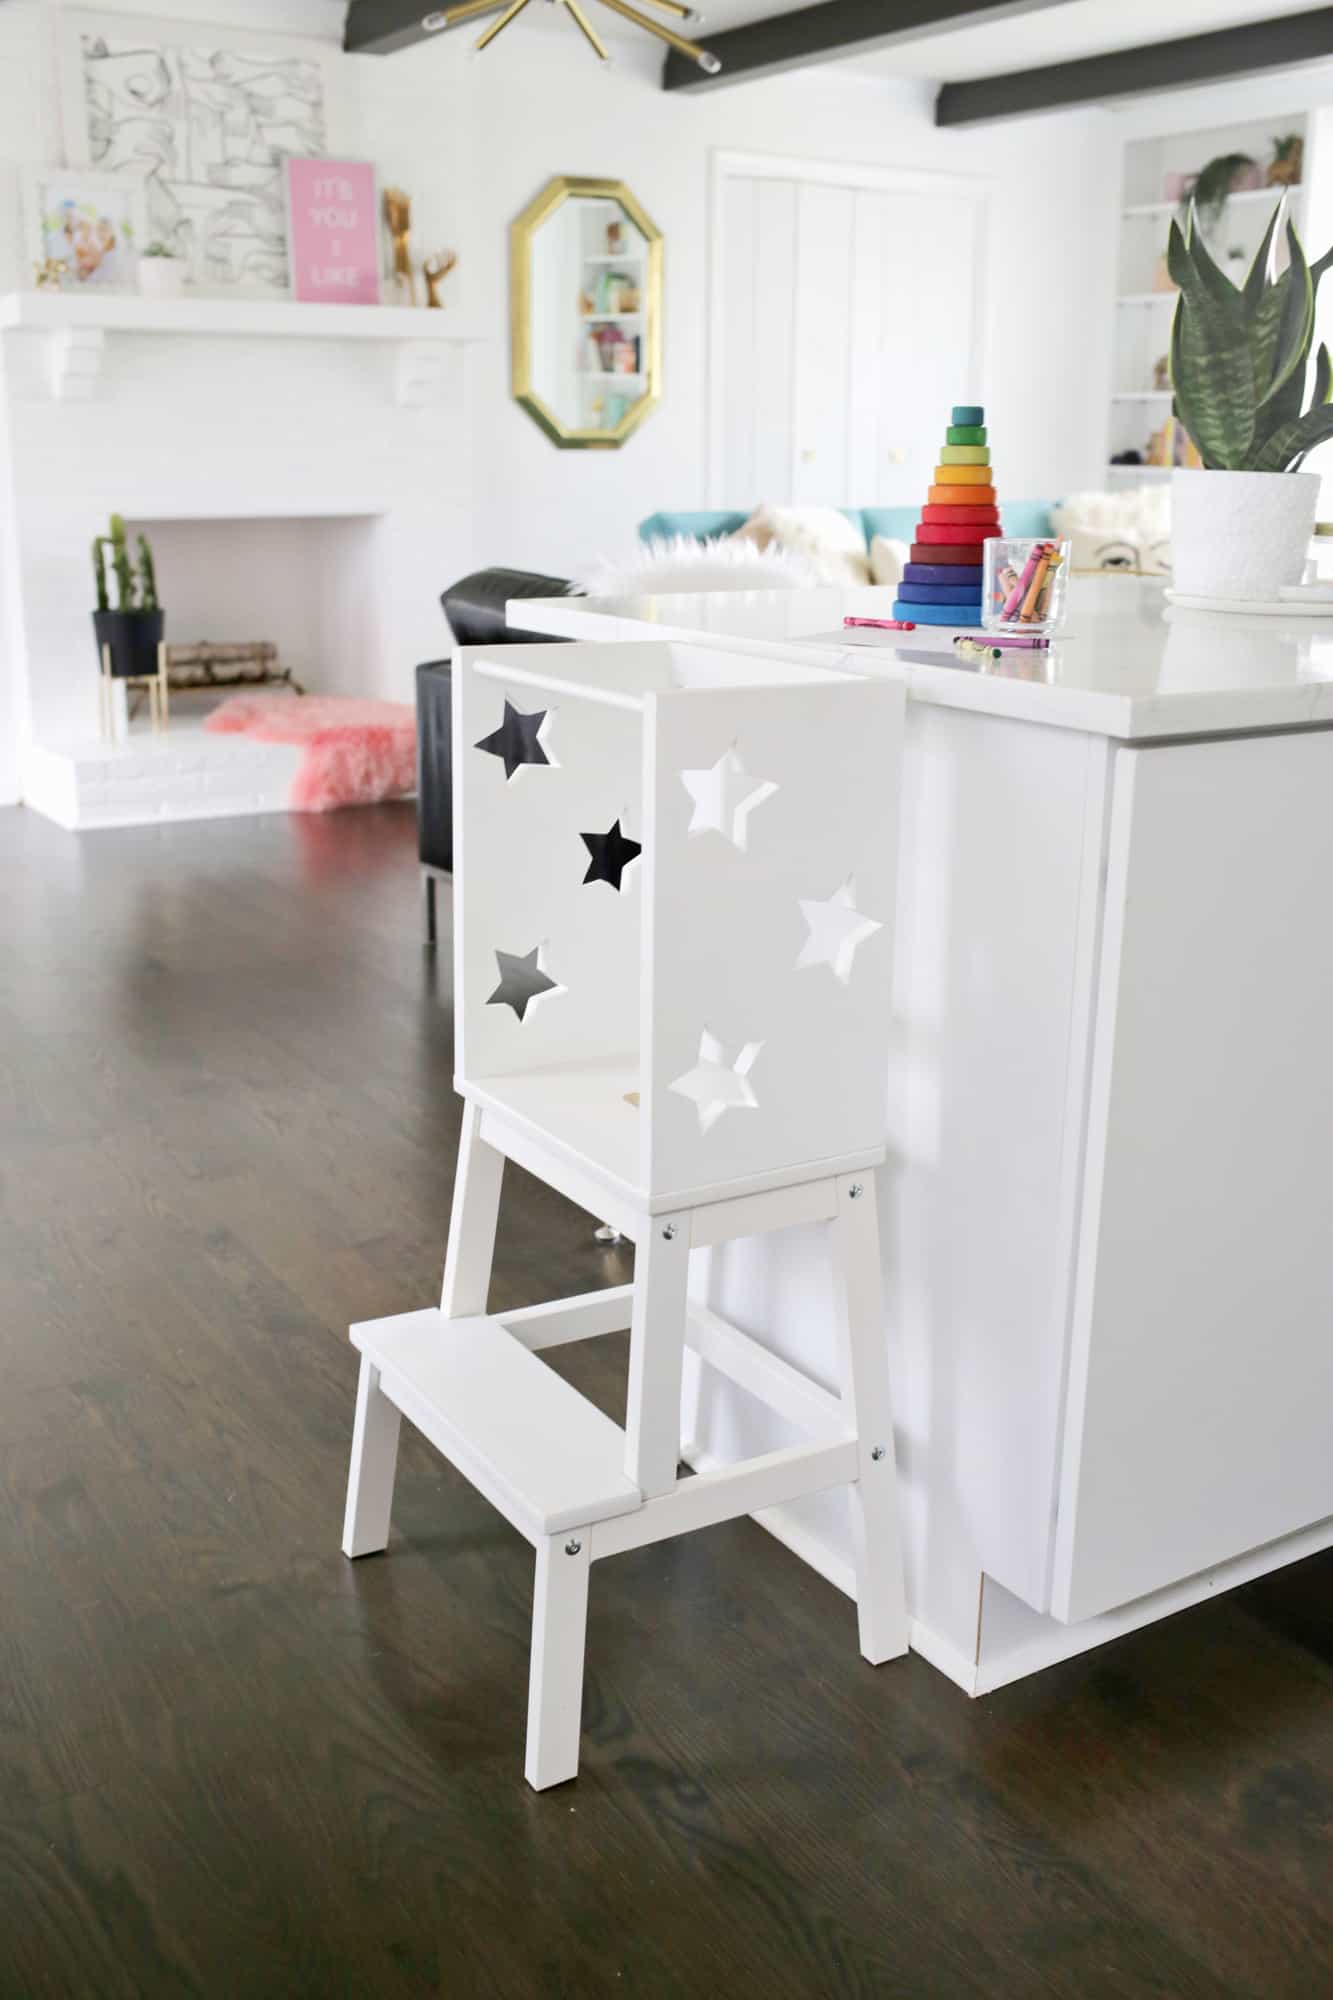
To make my tower look a little more custom, I traced some stars onto the sides of the tower and used a jig saw to cut out the stars. I drilled a hole big enough for the saw bit to fit through at the middle bottom of each star point so that I could have a starting hole to easily cut one direction and then the other direction and end up with a star shape at the end. If you like the star idea but don’t want to cut them out, you could also use these and paint them the same or a different color than your wood.
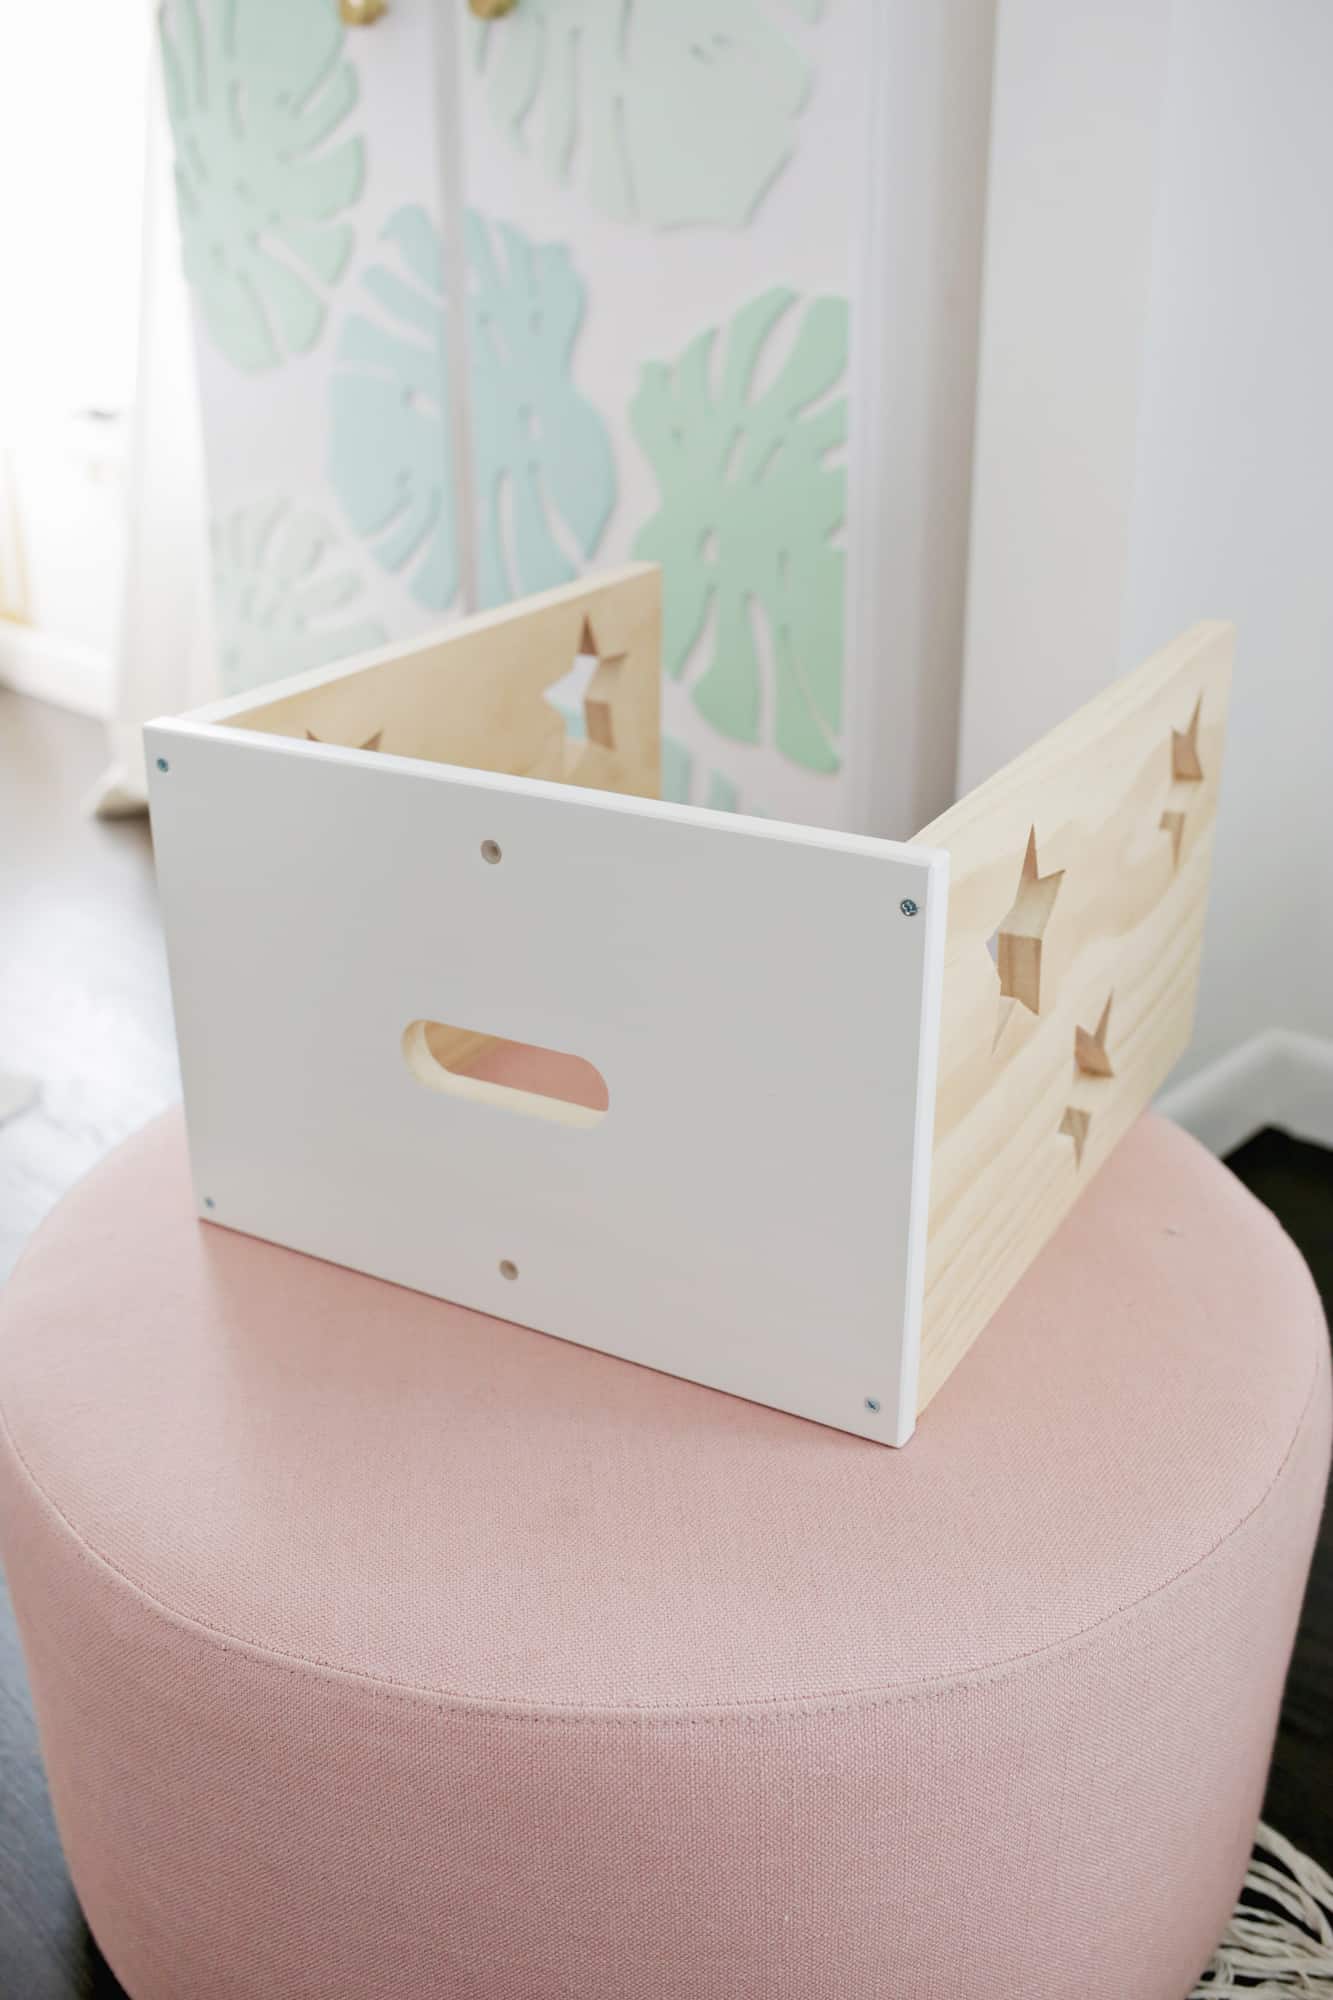
 Sand the edges of all your cut wood to smooth out all the edges. Get another pair of hands to help you line up your side panels at the side edges of the top piece of your Ikea stool and pre-drill your screw holes from the bottom side of the stool top (I would do 2-3 on each side). Use #8 screws to attach the sides to the stool top from underneath. Mine feels really secure when all put together, but if you want some extra stability you could also use some small “L” brackets at the base of your side pieces to double secure them to your stool top as well. Isn’t that pink pouf so pretty (here’s a similar one)?
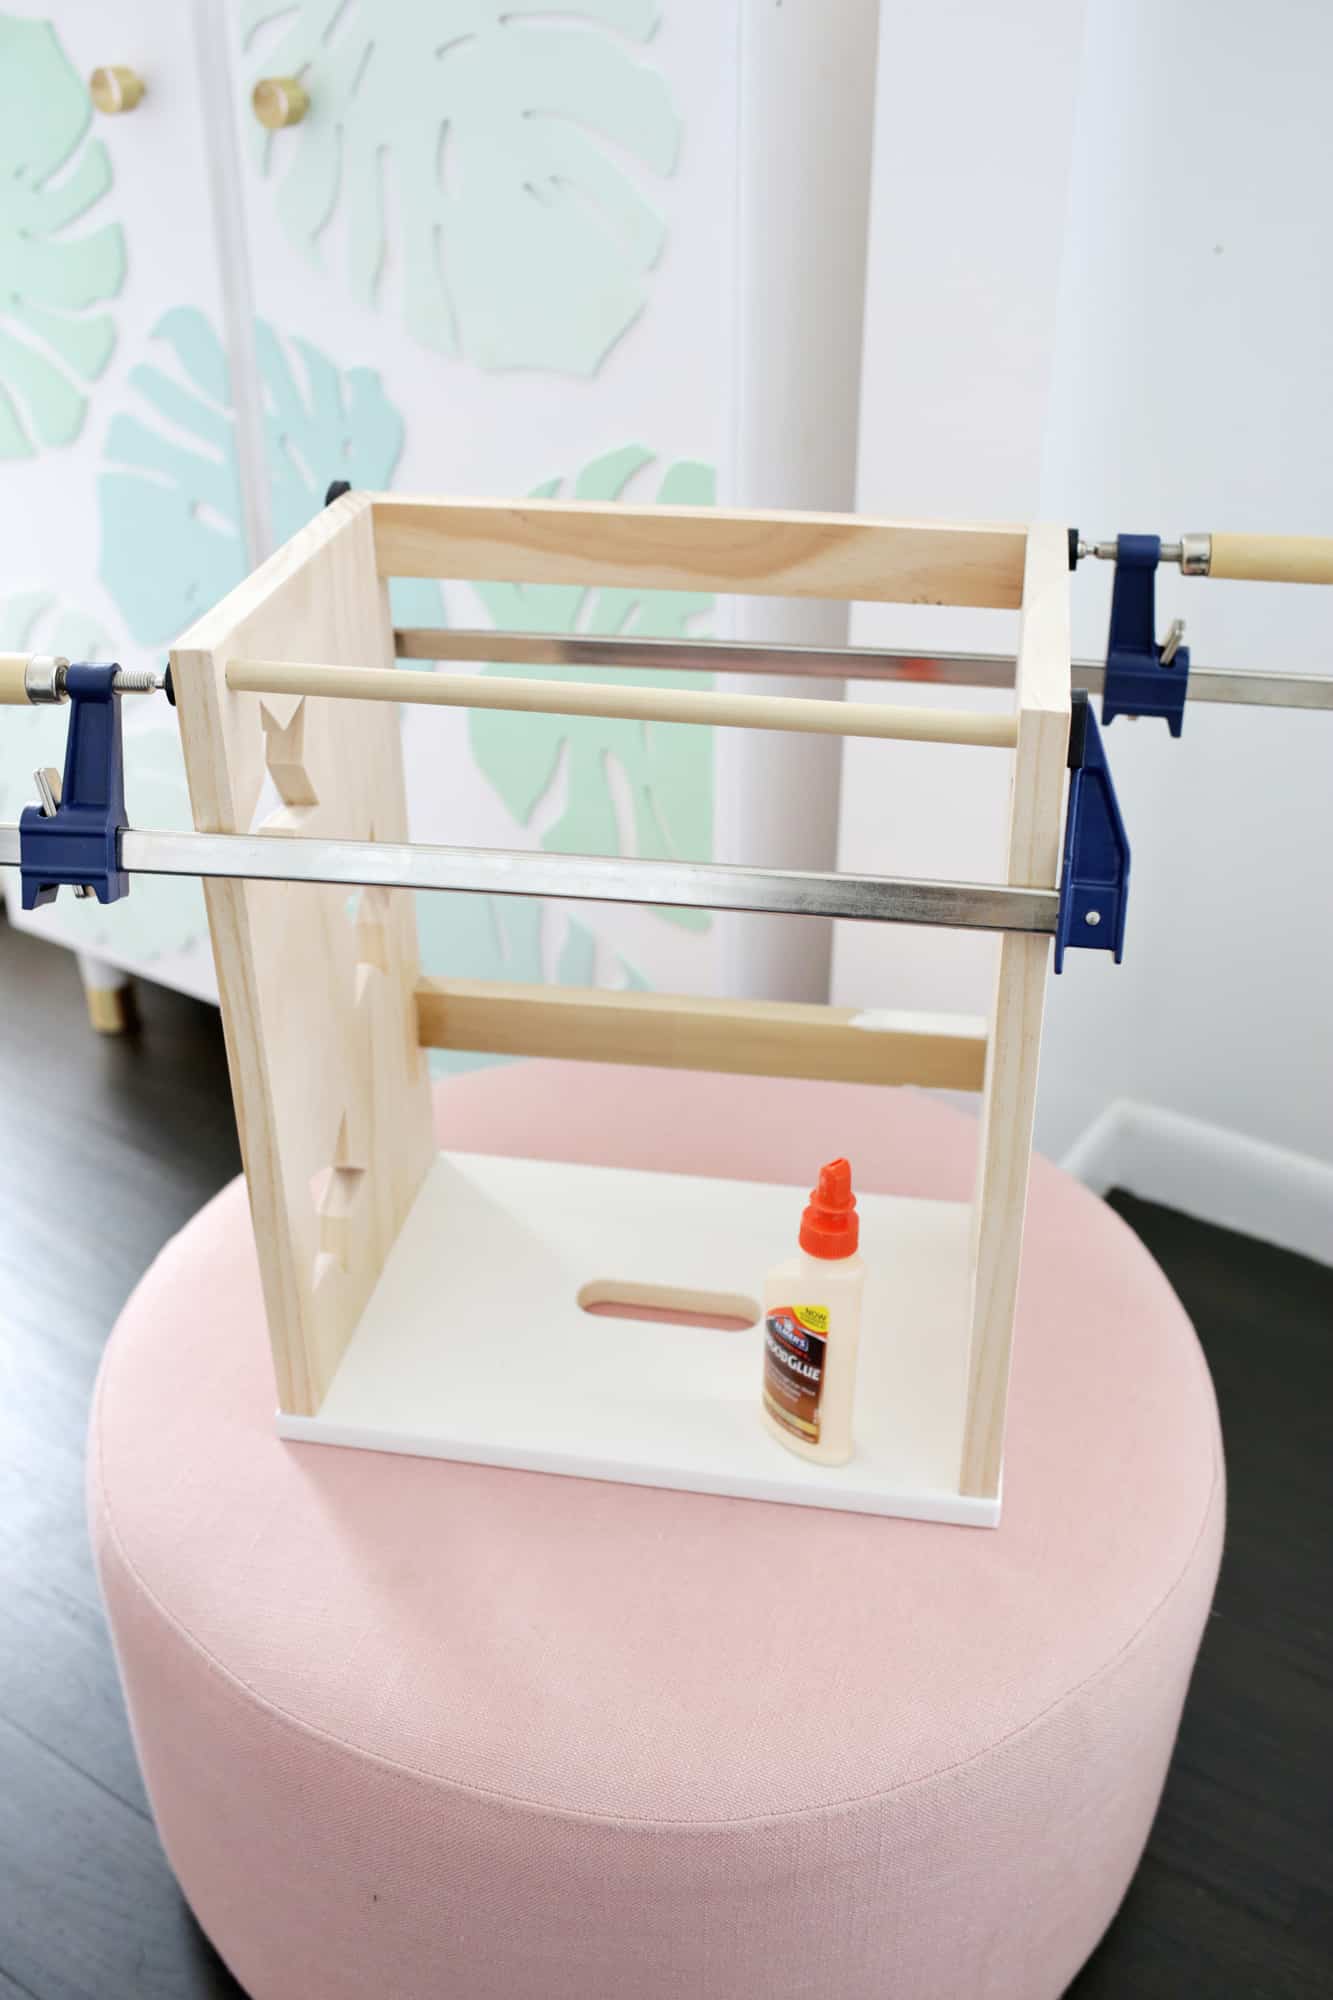
Use your wood glue to glue your two 16″ front bars and your 16″ dowel rod in place. I lined up my top front bar with the top edges of the two side pieces, glued the other bar about 4″ up from the bottom, and glued the dowel rod just 1/2″ in from the top and back edges. Use your clamps to clamp your structure together until the glue sets. If you don’t want to buy clamps, then I would suggest using a quick dry glue, holding the structure in place for 5 minutes or so, and then drilling your holes and putting in your screws right away to keep the structure together.
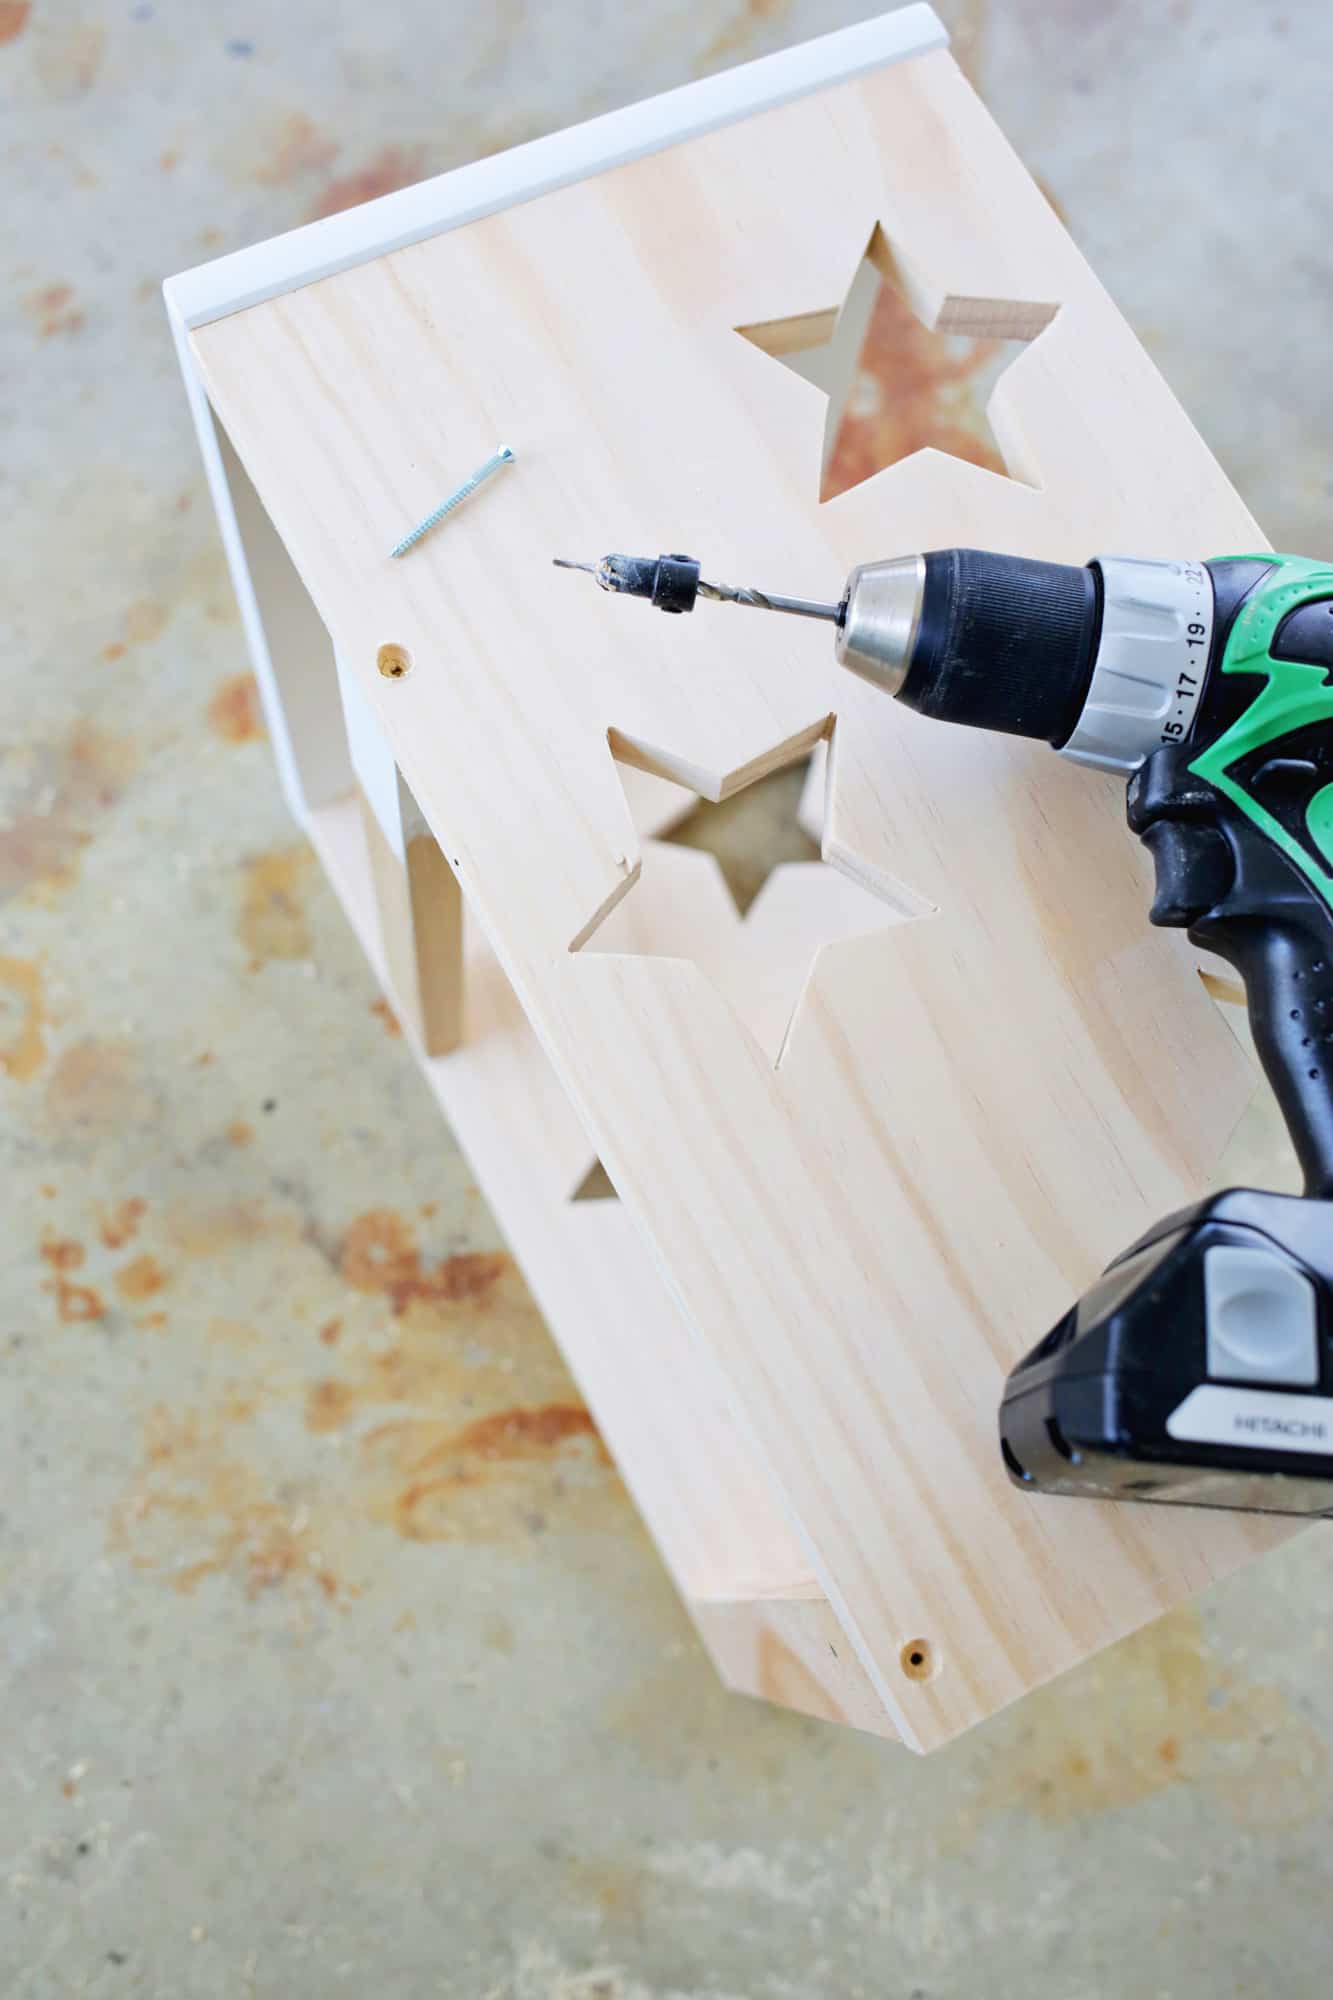
Once your glue is set, you can remove the clamps and pre-drill holes to attach your bars and dowel into your wood sides more securely. Use #8 screws for the bars and #6 screws for the dowel rod. Remember to double check where you are drilling so you make sure you are going into the bar or dowel behind the wood. You can measure where that spot should be if you aren’t sure.
If you want to make your screw heads disappear, you can use a countersink bit to make a shallow hole a little wider than the screw head before attaching the screw and then fill in the divot above the screw with wood filler and sand smooth once dry. It’s my favorite trick when making things with wood for a seamless look!
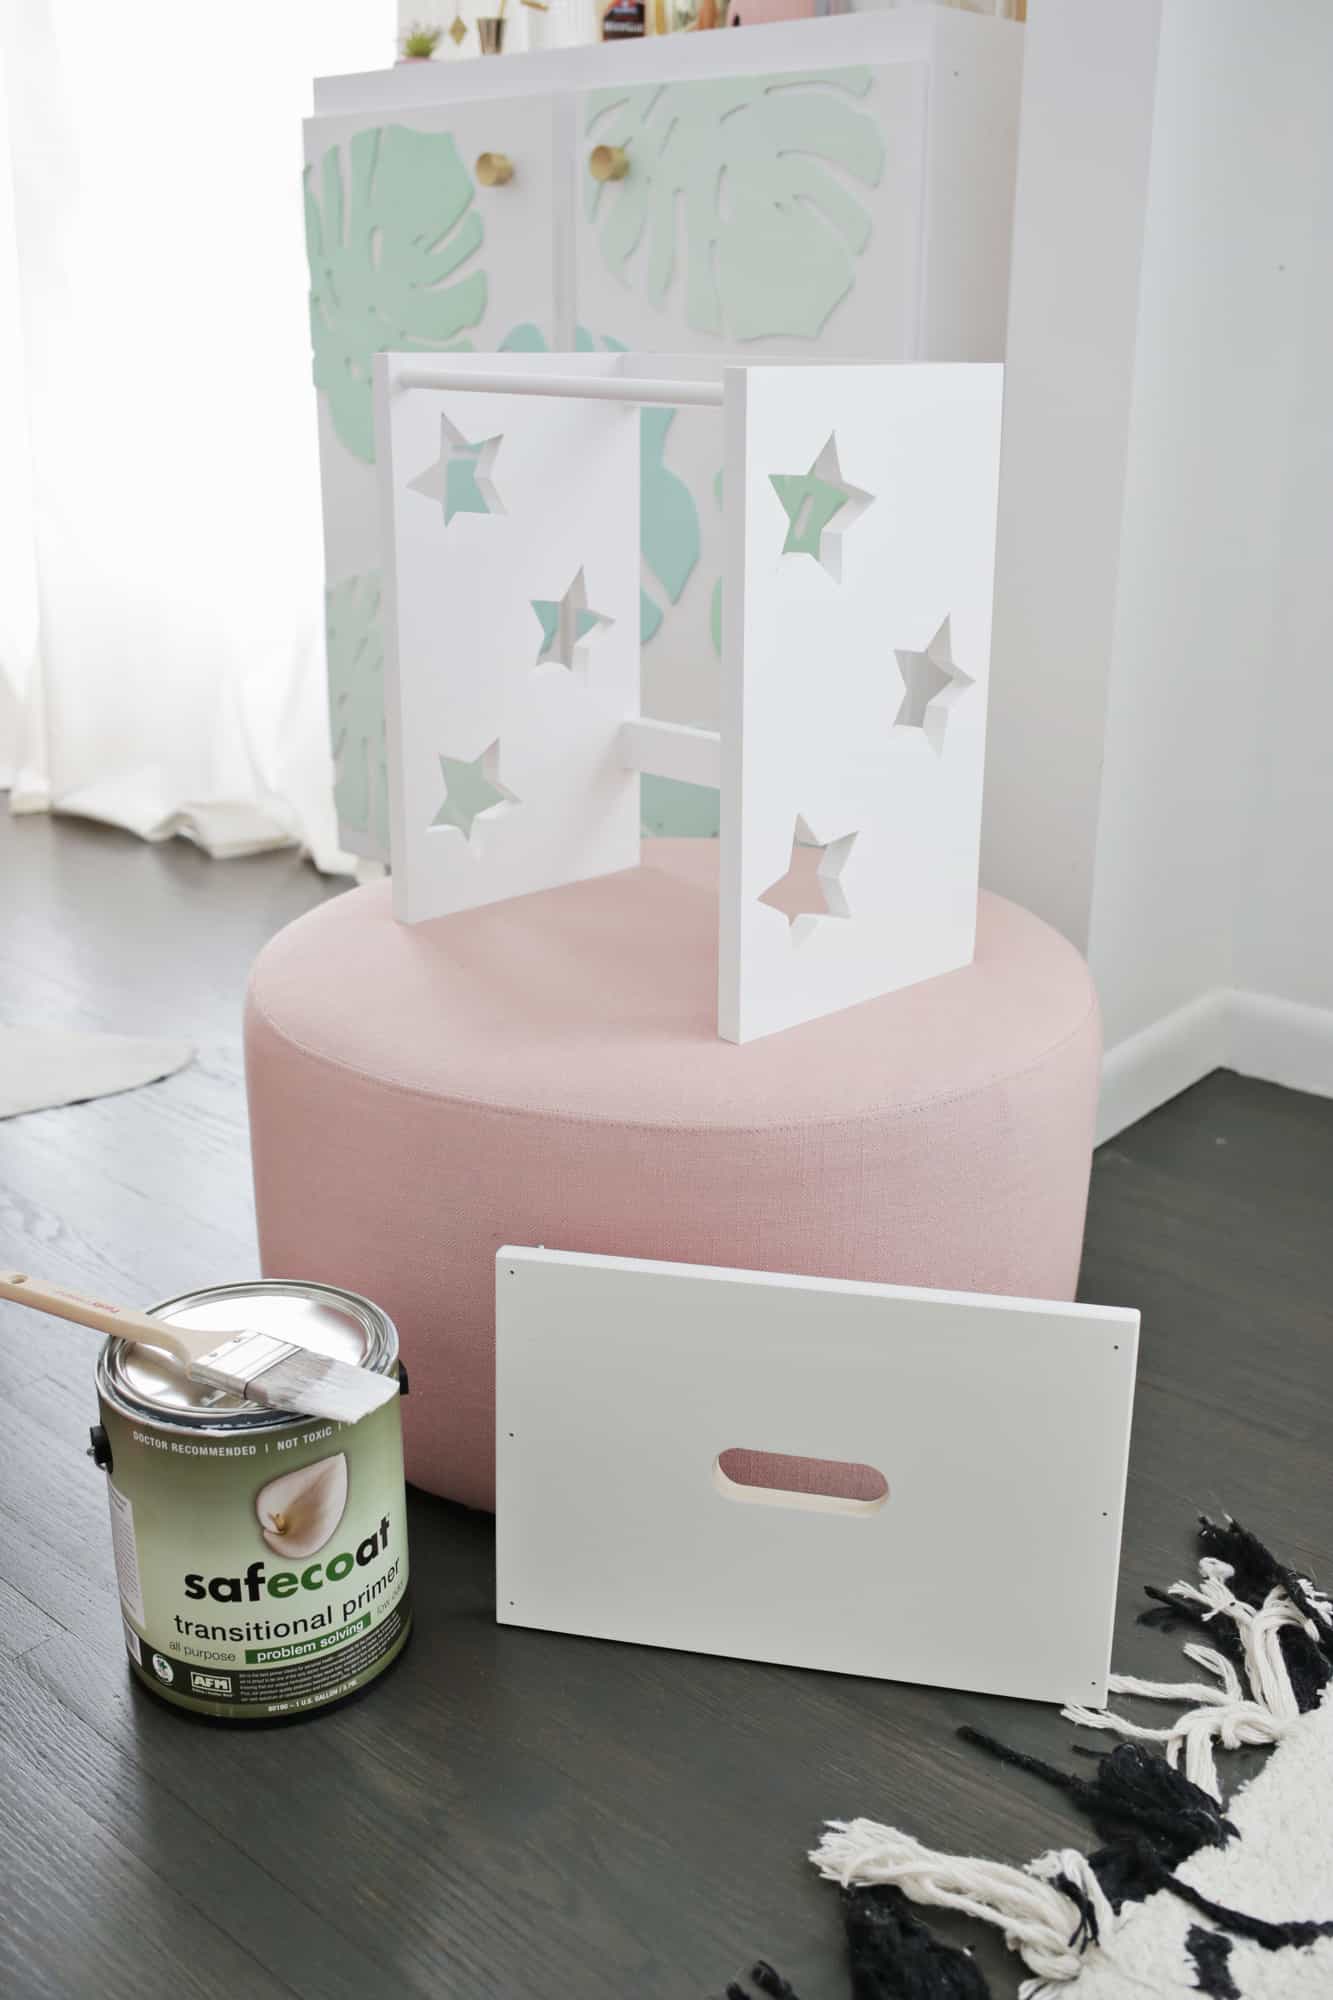
Once your bars and dowel are securely attached, paint/stain your wood to your liking and it’s ready to attach! I found it easier to remove my top from my stool base while painting it and then reattach it, but you can leave it on as well.
Once the paint is dry, assemble the bottom of your Ikea stool and attach your top step with the added pieces to the rest of the Ikea stool base. Now your learning tower is ready for action! As an added safety measure, you can also put gripper pads on the bottom of the stool legs and some non-slip strips on the tower steps and platform if you’d like to keep the stool from moving and give little climbers a bit more grip. I did both and they help keep the stool and her feet in place.
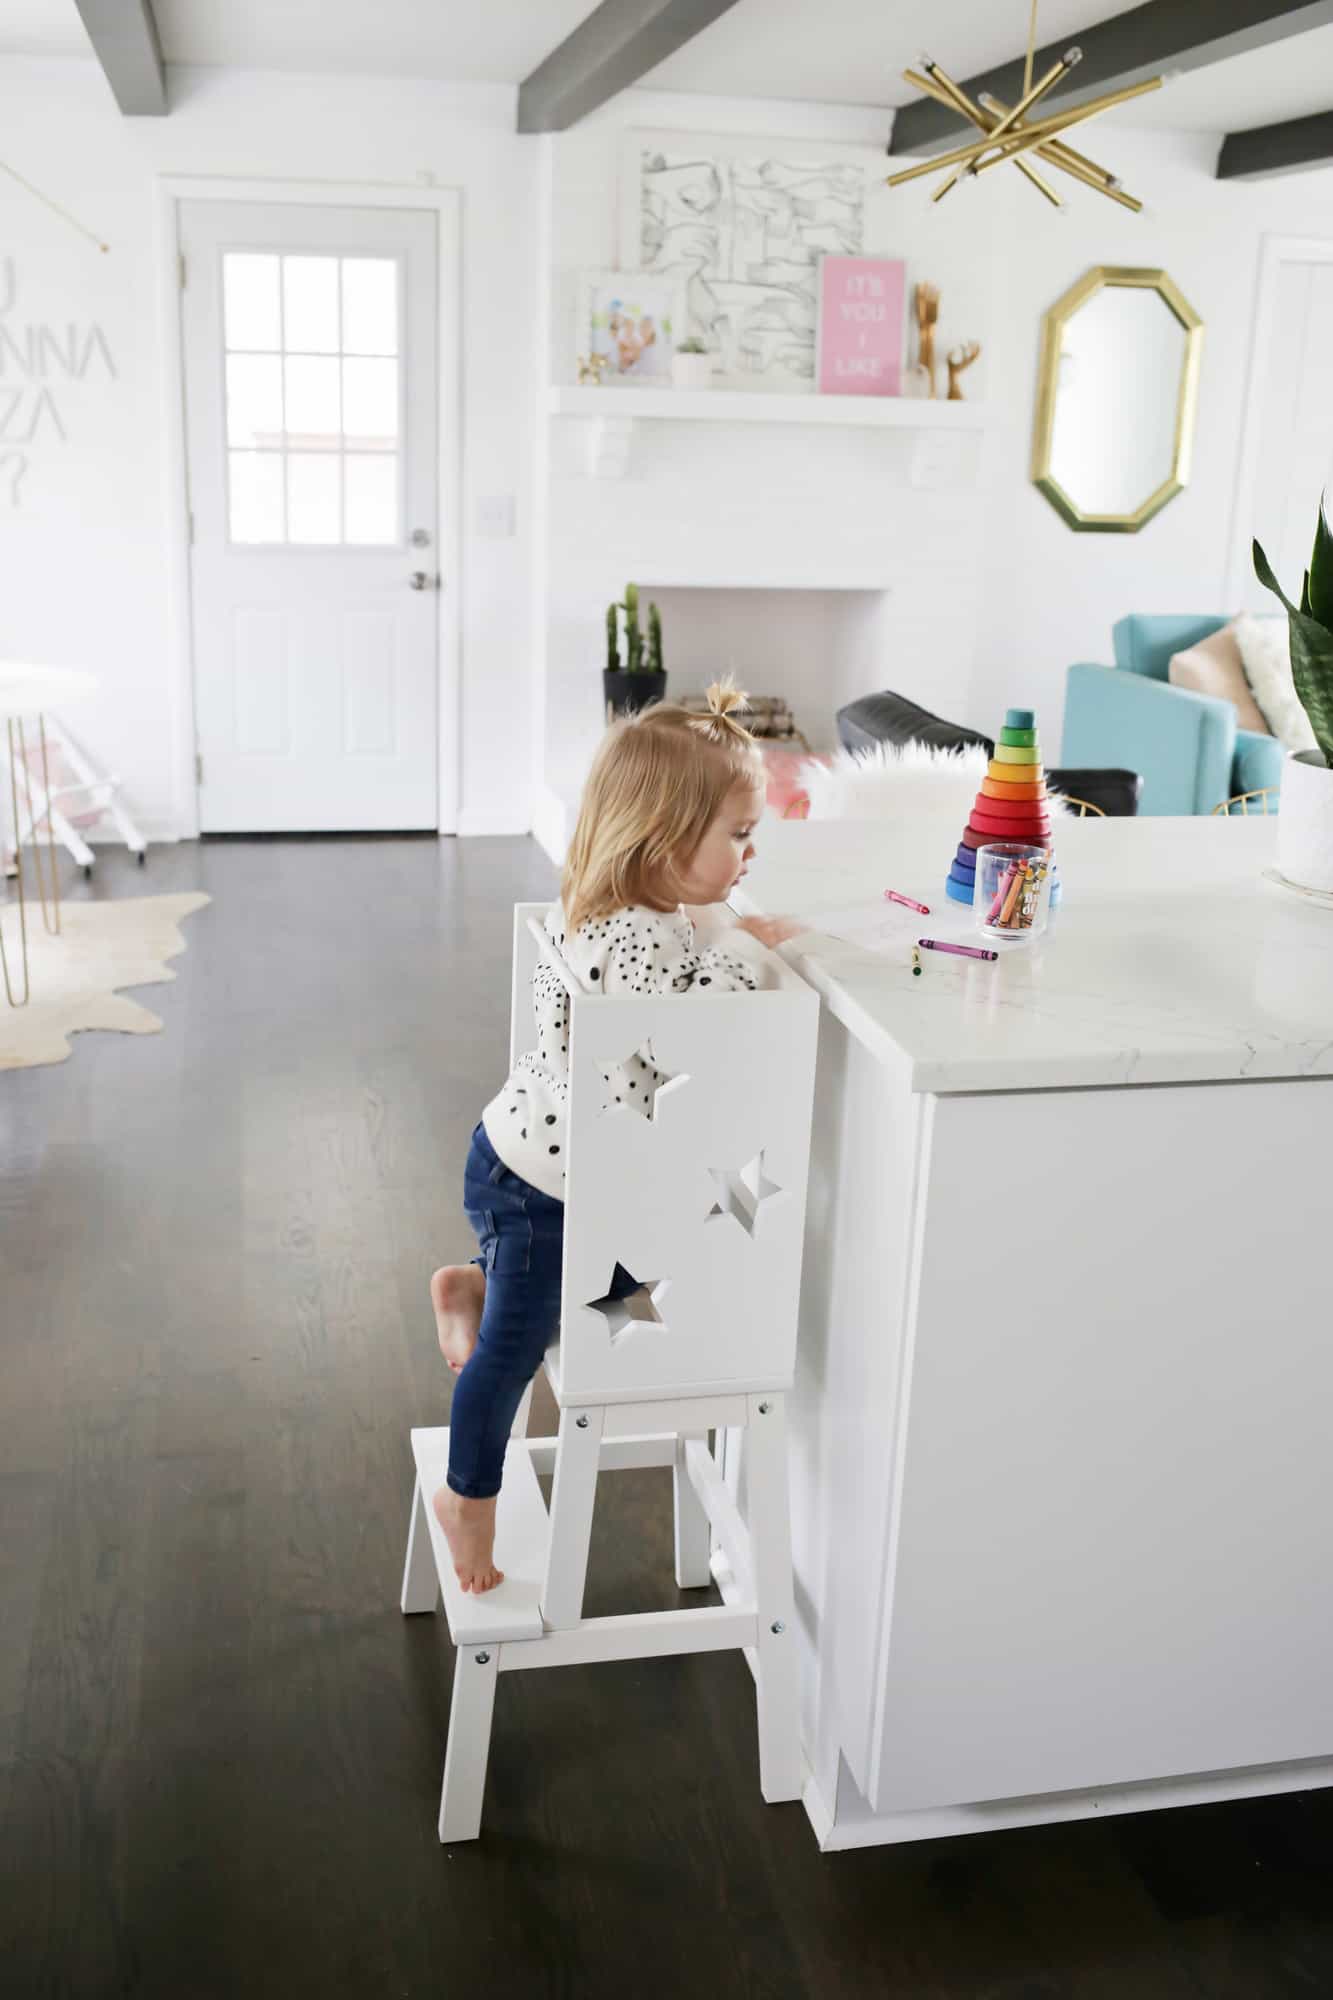
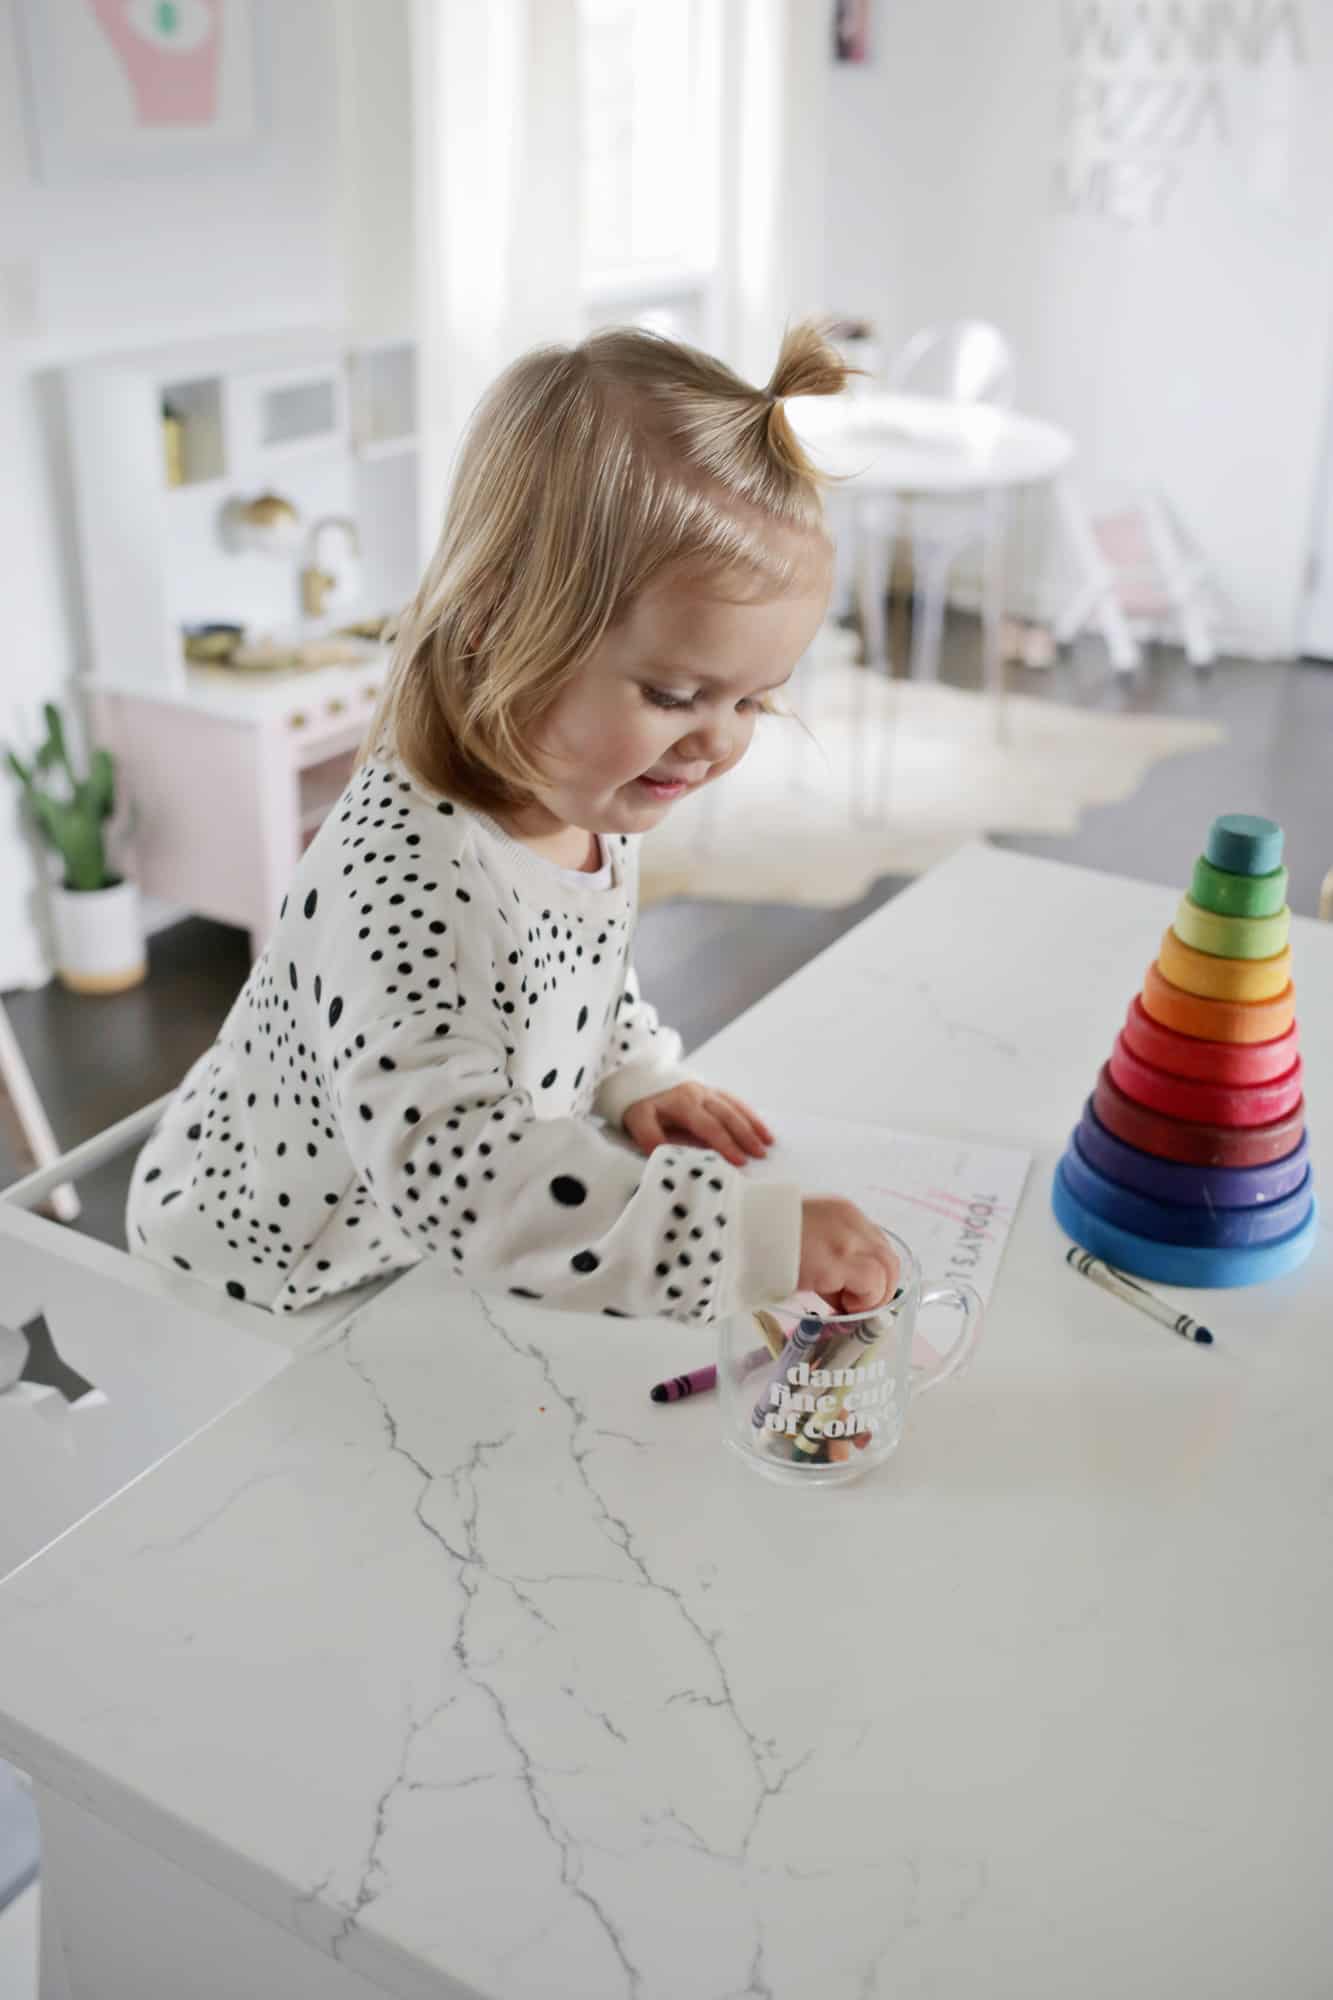
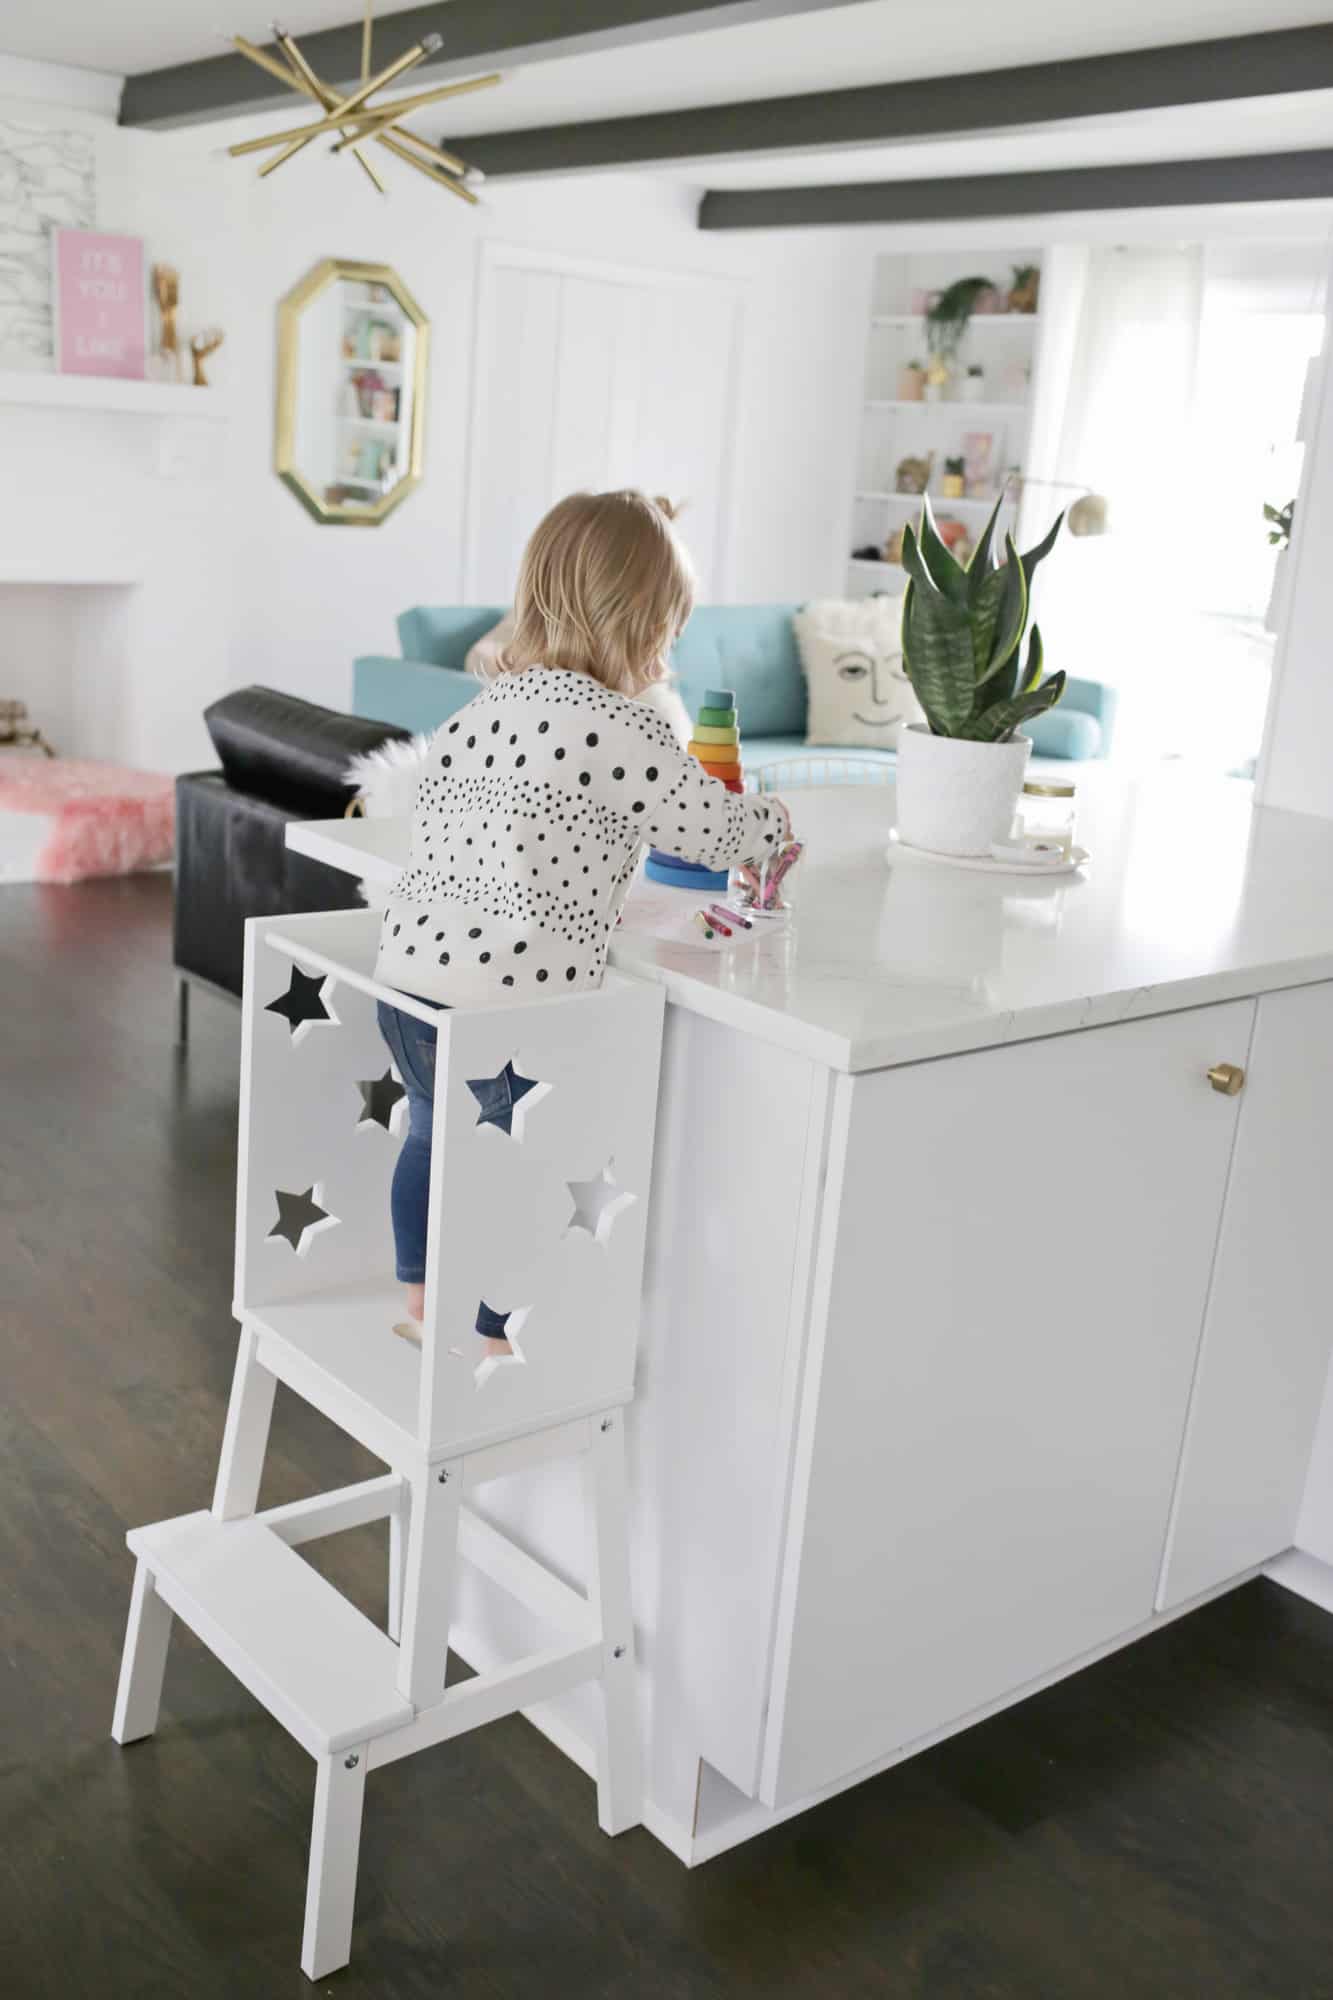
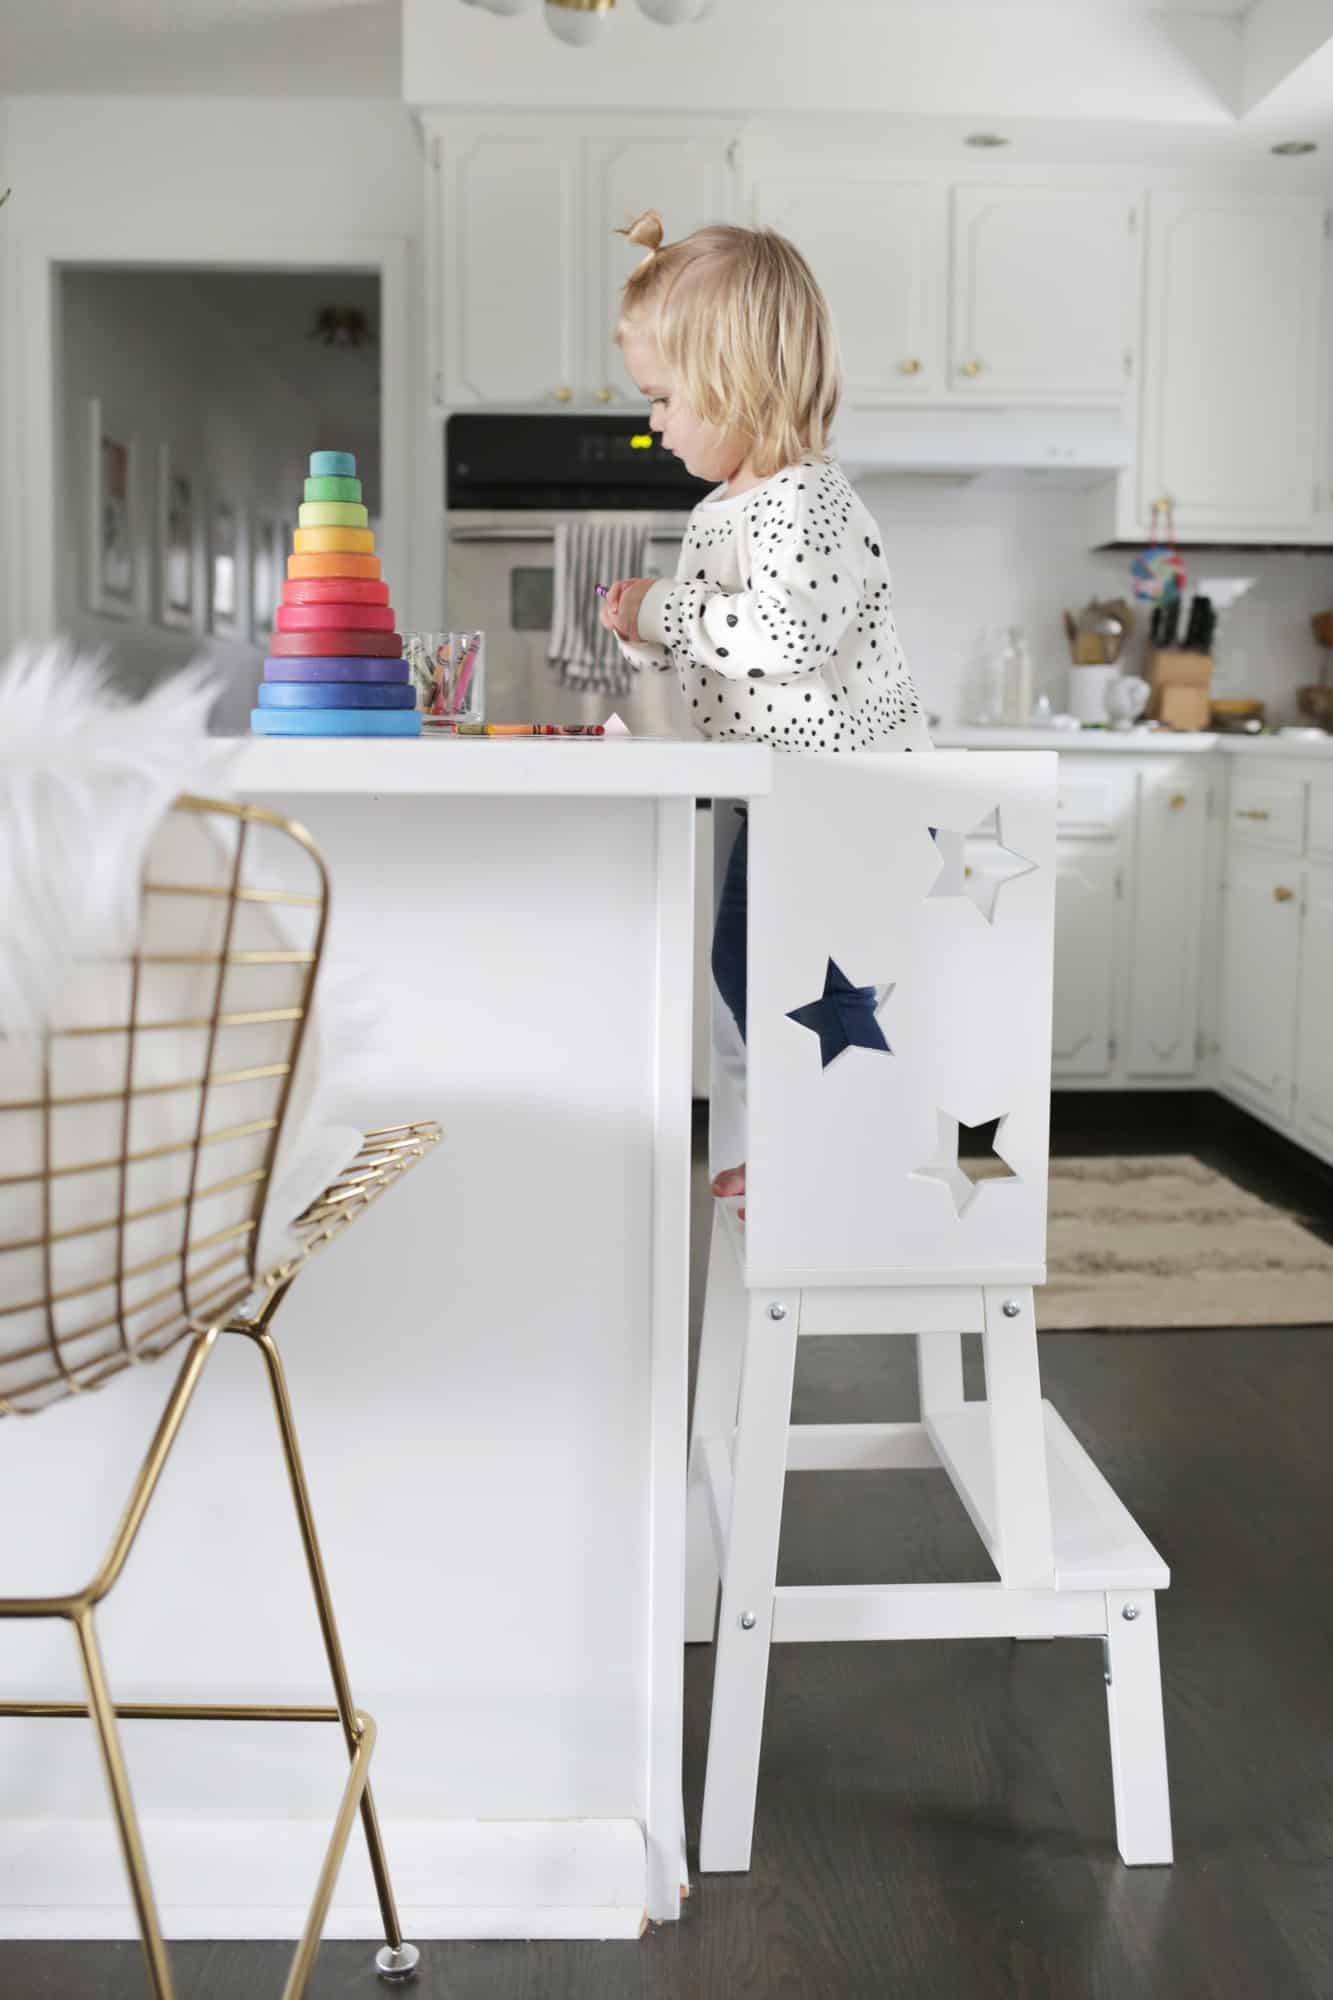
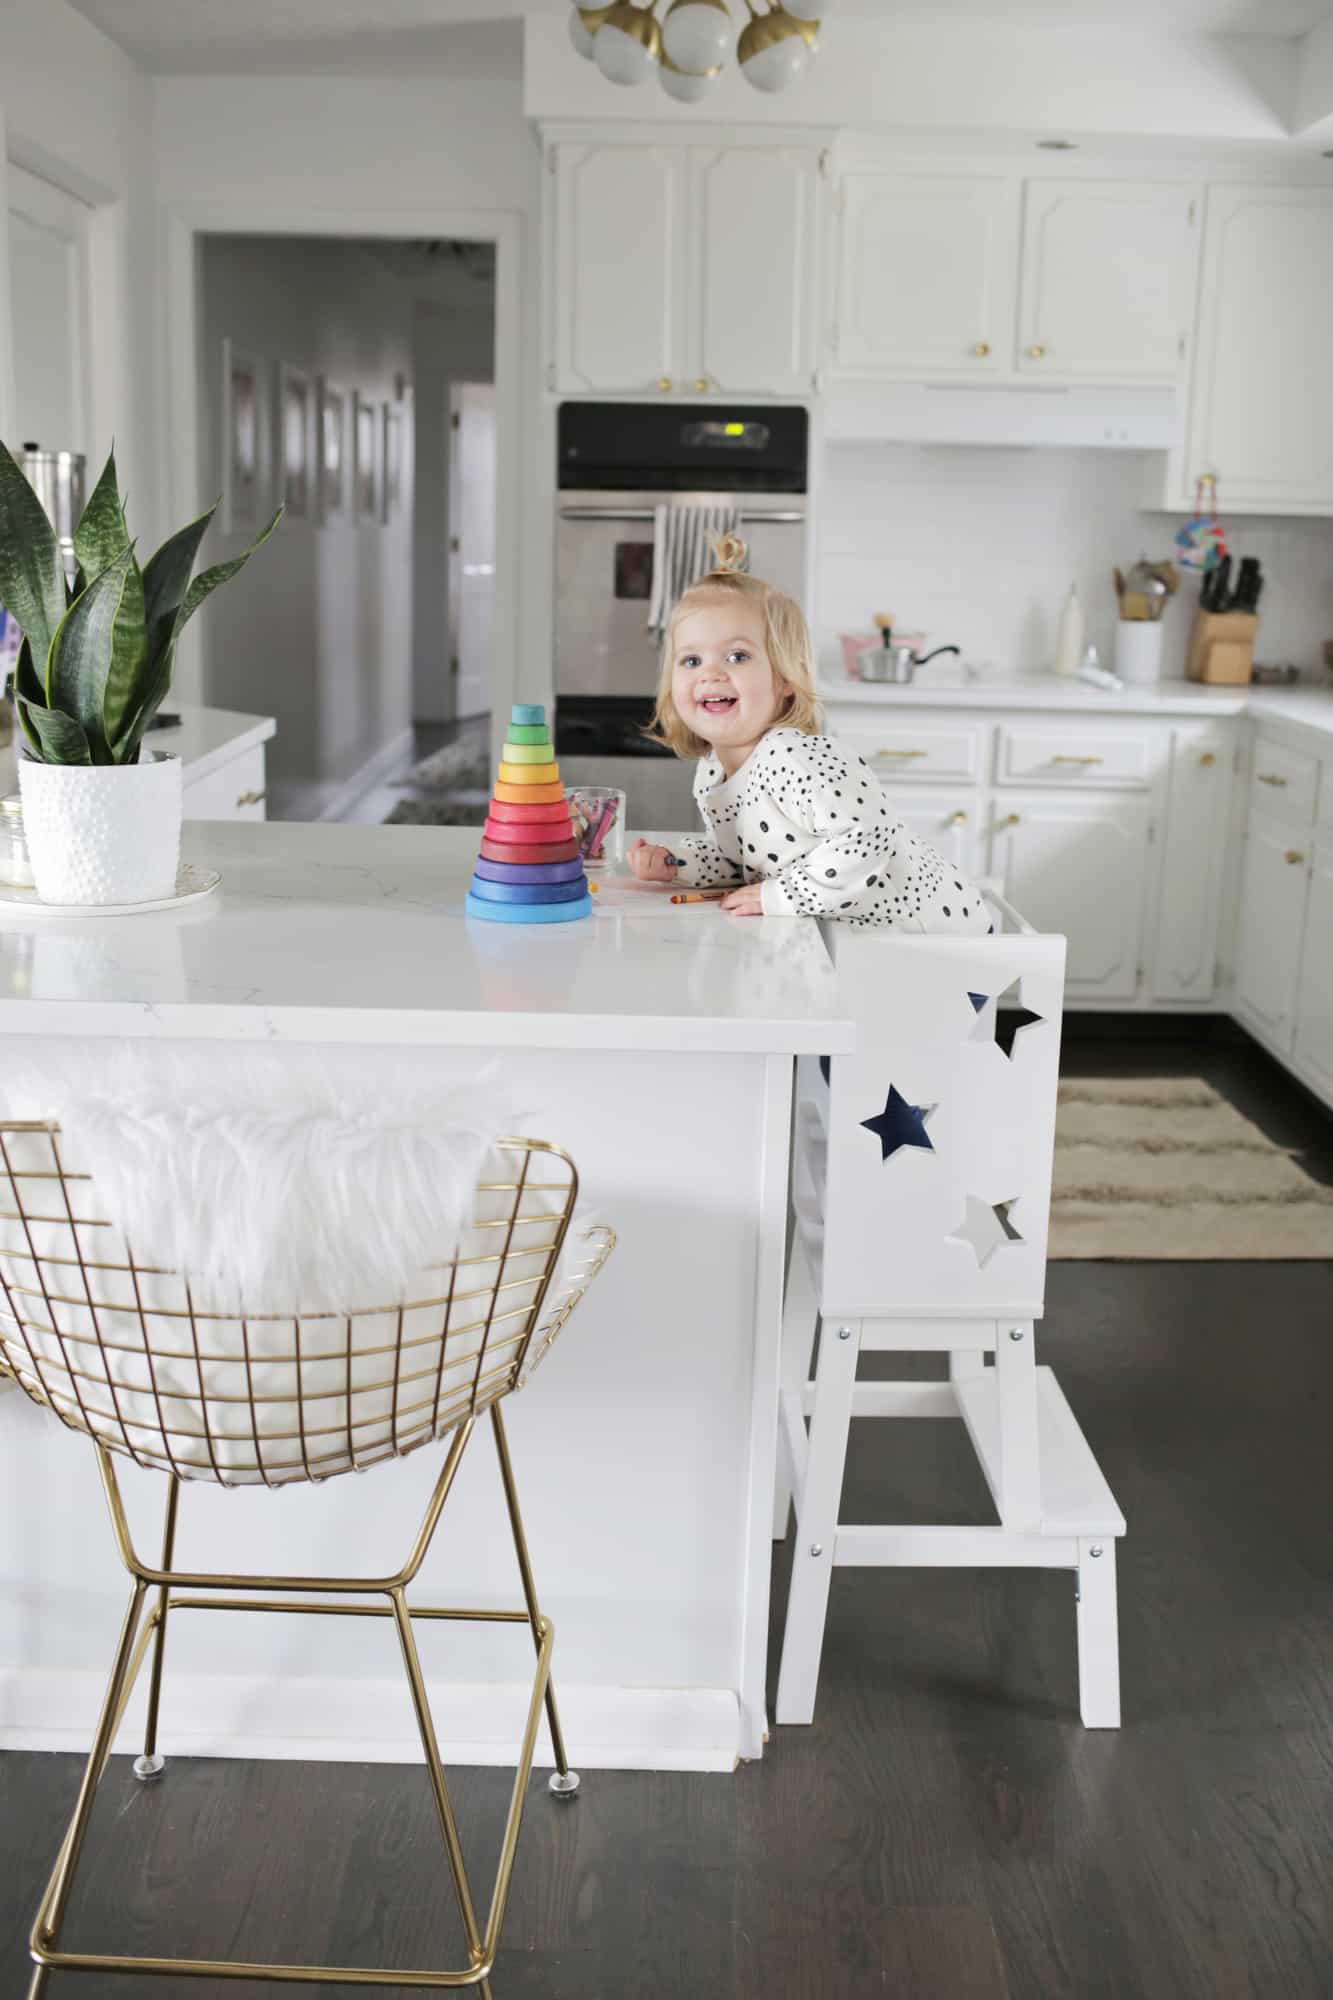 Can you tell that she loves it?! Basically as soon as the stool legs hit the kitchen floor, Lola was climbing up into the tower so excited to be up high with mommy. It took a day or two of showing her the best way to get in and out before she mastered it, but just a few days later she’s already a pro. I have heard moms say that it took a few nights for certain kids to like being in the tower and doing counter activities while others immediately took to it and loved the new height and independence. So don’t give up if it takes them a few times to warm up to it! If DIYing this project is not your thing, you can always leave it to pros and get one of these all ready to go (I love this one since the height is adjustable!). It’s nice to sit at the counter as well in our counter stools (similar here) and hang out at the same height together. We’ve made a lot of DIY kid projects here at the blog but this is definitely one of my faves!
This is extra helpful for me as I’ve been having back issues lately, so anything that helps me be near her without having to hold her for long periods is a big plus until that heals. Again, don’t leave kids unattended while in the tower and be sure they have the developmental capabilities to use the tower before trying it. This has already been worth the effort it took to make it within the first few weeks and I’m excited to use it for lots of counter crafts and cooking in the months to come! xo. Laura
P.S. Check out our tips on How to Go Out to Eat With a Toddler!